DIY Hardwood Floor Restoration Tips: 7 Steps That Work

DIY Hardwood Floor Restoration Tips: 7 Steps That Work

  • October 1, 2026
  • in Blog
  • by

Table of Contents

Last Updated: September 30, 2026

Diagnose Your Floor Before You Touch a Single Tool

DIY hardwood floor restoration tips only work when they match your floor’s actual condition. Dull surface haze needs a different fix than deep gouges down to bare wood. Skip the diagnosis and you will either waste a weekend on a polish that does nothing, or sand away years of life from boards that only needed a light screen.

  • Cosmetic wear: dull finish, light scratches, no bare wood. Polish and buff.
  • Partial wear: traffic lanes gone flat, some gray wood showing. Screen and recoat.
  • Full wear: deep scratches, stains, cupping, or an old failing finish. Full sand and refinish.
Key Takeaway
Match the method to the damage tier. Sanding a floor that only needed a screen removes decades of usable wood in an afternoon, and you cannot put it back.

How to Restore Hardwood Floors Without Sanding

Restoring hardwood floors without sanding is the right call when the finish is intact but tired. This is wood floor rejuvenation, not refinishing, and it buys you years before the heavy equipment comes out. No-sand methods fall into three categories.

Watch Out
Never use a restorer or polish on a floor with bare gray wood showing. The product has nothing to bond to, it will peel within weeks, and stripping that mess before refinishing costs more than doing it right the first time.
Pro Tip
Before committing to a full-room restorer, test a 2-foot square in a closet or behind a piece of furniture. Let it cure a full 24 hours, then scratch it lightly with a coin. If it flakes or peels, the bond is failing and you need to screen-and-recoat instead.

Sanding and Refinishing: The Full Restoration Route

This is the deep restoration path: expect two to four days for an average room once you count drying time. You are stripping the old finish, leveling the wood, and building a new protective coating from bare wood up.
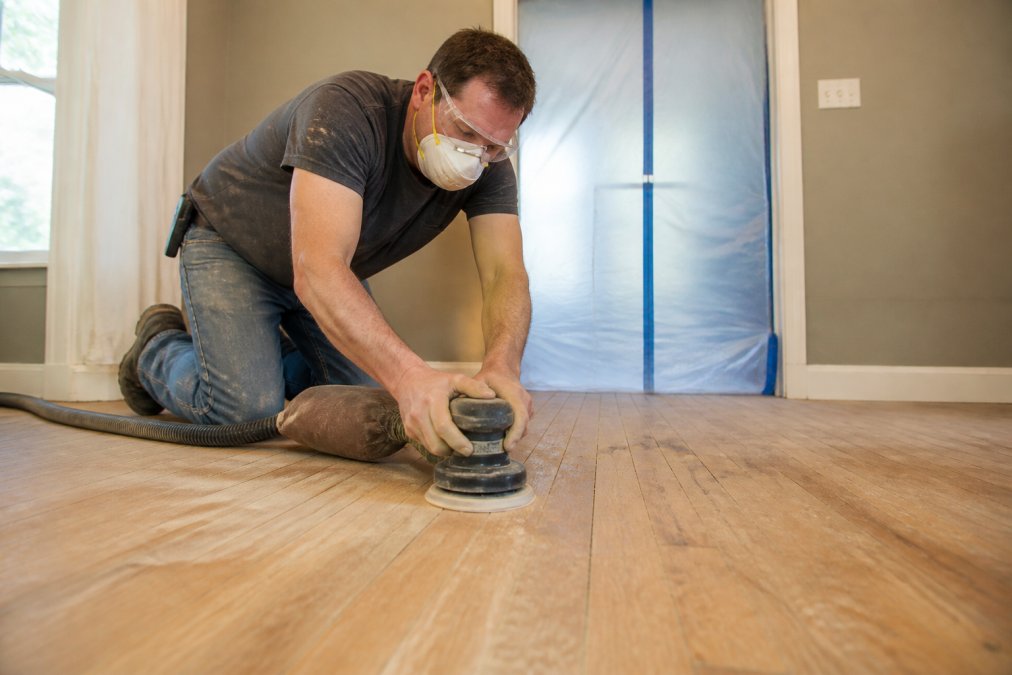
Homeowner using an orbital sander during a hardwood floor restoration project in a home

Step 1: Prep and Remove Base Molding

Pull the base molding and shoe molding first. Sanding right up to installed trim leaves an unsanded line you will see forever, and the trim takes a beating from the drum. Label each piece as you remove it, set every nail, then fill gouges and gaps with a color-matched filler like Woodwise Wood Filler.

Step 2: Sand With the Right Grit Sequence

Rent a drum sander for the field and an edger for the perimeter. A Clarke drum sander rents for roughly $60 per day, and the learning curve is steep: keep the drum moving the moment it touches the floor or you will gouge a divot in seconds. Run Norton Abrasives belts coarse to fine, and never skip a grit:

Stage Grit Purpose
Rough cut 36-40 Remove old finish and level boards
Middle cut 60-80 Erase rough-cut scratches
Fine cut 100-120 Smooth the wood grain
Screen 120-150 Prep between coats

Hand-sand edges and corners with 3M SandBlaster Pro sheets in the same grit sequence. A common mistake is rushing the fine cuts. Those scratches look shallow dry, then telegraph through the finish once it cures.

Step 3: Remove Dust and Apply Your Finish

Sanding dust is the enemy of a clean finish. Vacuum every surface, then wipe the whole floor with a tack cloth, and repeat until a white rag comes up clean. Seal bare wood with a wood sealer or stain if you are changing color; Minwax Wood Finish penetrates deep for even tone. For the topcoat, a waterborne polyurethane like Varathane Water-Based Polyurethane dries fast with low odor and easy soap-and-water cleanup. Bona Traffic HD is the tougher option for high-traffic rooms, with recoat in two to three hours and a low-VOC formula. Apply thin coats, screen between coats, and let each coat cure fully before walking on it.

How to Fix Scratches on Hardwood Floors

Fixing scratches on hardwood floors comes down to depth. Surface scratches get a touch-up; deep scratches get filler and finish.

Hardwood Floor Maintenance Tips That Protect Your Work

Hardwood floor maintenance tips matter most in the first month after restoration, when the new finish is still curing.

  • Damp mop only. A microfiber mop like the Bona Microfiber Mop, wrung nearly dry, picks up dust without pushing water into seams. Standing water is what kills hardwood.
  • Felt pads on every leg. Chairs, tables, and sofas. This one step prevents most of the scratches people call us about.
  • Trim pet nails and place mats at entries. Grit tracked in from outside acts like sandpaper underfoot.
  • Skip the all-purpose spray cleaner. Many leave a residue that dulls the finish and builds up over time.
  • Sweep or vacuum weekly. Fine grit is the quiet destroyer of wood floor shine.

Non-Toxic Products and Floor Type Compatibility

Eco-friendly options have caught up to traditional finishes, and floor type decides what you can safely use. Two decisions drive everything: what is safe for your household, and what is safe for your specific floor.

Low-VOC and Pet-Safe Finish Options

The finish aisle splits into three chemistry families with sharply different VOC profiles:

  • Waterborne polyurethane. Brands like Varathane Water-Based Polyurethane and Bona Traffic HD carry low-VOC formulas. Water is the carrier, so odor is minimal and you can often recoat in two to three hours. The trade-off: waterborne finishes can raise the grain slightly on bare wood, which is why a sealer coat matters. Bona Traffic HD is the tougher option for high-traffic rooms.
  • Oil-modified and solvent-based polyurethane. These cure harder and amber the wood over time, which some homeowners want, but they carry high VOC content, strong odor, and a longer cure. If indoor air quality is a priority, avoid this family.
  • Natural oils and hardwax oils. Built around linseed, tung, or plant-based oils, these penetrate the wood rather than film-forming on top. They are popular for low-toxicity renovations because they contain no solvents and off-gas very little. The trade-off is maintenance: periodic re-oiling, no scratch-resistant film, and no waterborne polyurethane topcoat without a full strip.

Floor Type Compatibility: What You Can and Cannot Refinish

Compatibility is where DIYers get burned, with consequences from wasted product to destroyed flooring:

  • Solid hardwood. Safe for sanding, screening, and water-based finishes. This is the only category where a full drum-sand refinish is reliably appropriate. You have enough thickness to remove the old finish and level the boards.
  • Engineered wood. The top veneer is thin, often 2 to 4 millimeters on budget products, up to 6 on premium ones, and a drum sander can cut through it in a single pass. Screen-and-recoat is usually the ceiling here, done with a light touch. If the veneer is worn through to the core, the boards need replacement.
  • Laminate and vinyl. Never sand. These are not wood. A drum sander will shred the wear layer instantly, and refinishing products will not bond. Laminate restoration is a cleaning and repair job, not a refinishing job.
  • Wax-finished floors. Most modern water-based topcoats will not bond over wax, which acts as a release agent. Either strip the wax completely with a wax remover and then screen, or stay in the wax maintenance system. Mixing the two guarantees peeling failure.
Pro Tip
Test any finish or restorer on a closet floor or a hidden corner first. Let it cure a full 24 hours. If it bonds and dries clear, you are safe. If it beads, fish-eyes, or peels, you just saved your entire floor. Fish-eyeing, where the finish pulls away into small craters, almost always means contamination from wax, silicone, or an incompatible prior product.
Watch Out
If you are unsure whether your floor is solid or engineered, pull a floor register or a transition strip and look at the board’s edge. Solid wood shows a continuous grain pattern through the full thickness. Engineered wood shows a distinct top veneer layer glued to a plywood or composite core. This five-minute check prevents the most expensive mistake in DIY floor restoration.

Common Mistakes and How Long Each Method Takes

Time expectations separate a smooth project from a frustrating one. Here is what each route realistically costs in hours, plus the mistakes that derail them.

Method Time to Complete Best For Common Mistake
Polish and buff 2-3 hours Dull finish, light scratches Skipping the deep clean first
Screen and recoat 1 day plus cure Worn traffic lanes Using too much finish per coat
Full sand and refinish 2-4 days Deep damage, bare wood Skipping grits to save time
Scratch spot repair 30-60 minutes Isolated marks Mismatched stain color

Frequently Asked Questions

What is the easiest way to restore hardwood floors?

For dull floors with light surface scratches, a no-sand method works best. Clean with a damp mop and a pH-neutral cleaner, then apply a polymer-based restorer like Rejuvenate Professional Wood Floor Restorer ($20 per bottle). It fills minor scuffs and adds shine in one mop-on coat. Deep gouges, gray wood, or worn-through finish need a full sand-and-refinish job. Diagnose first: if a drop of water beads on the surface, you can skip sanding.

How do I make old hardwood floors shine again without refinishing?

Start with deep cleaning to strip built-up residue, then buff the surface. A floor buffer with a soft pad brings back some luster. Follow with a wood floor polish or restorer designed for your finish type. Avoid wax on polyurethane floors, since it prevents future topcoats from bonding. This approach handles dull floors and surface scratches, but it will not fix deep scratches, stains, or bare wood. Expect to reapply every few months.

What is the best product to use to restore hardwood floors?

It depends on your goal. For quick cosmetic fixes, Rejuvenate Professional Wood Floor Restorer ($20 per bottle) fills scratches and adds gloss without sanding. For a full refinish, Bona Traffic HD ($120 per gallon) is a waterborne polyurethane with fast recoat times (2-3 hours) and strong scratch resistance. Budget DIYers often pair Varathane Water-Based Polyurethane ($25 per quart) with a drum sander rental ($60 per day). Match the product to your floor’s existing finish.

When should you call a professional for hardwood floor restoration?

Call a pro when your floors have widespread water damage, cupping, structural gaps, or finish worn down to bare wood across large areas. Full sand-and-refinish projects carry real risk: a drum sander can gouge a floor in seconds, and improper dust containment spreads sanding dust through your whole home. If your floor is older, thin, or you are unsure of the wood species, a professional assessment protects your investment. Many companies also offer deep cleaning for floors that do not need sanding.

LATEST POSTS
MOST POPULAR
TEXT WIDGET

What makes Cleanmate trusted above other cleaning service providers? When you combine higher standards, smarter strategies and superior quality all in one package, the result is top notch.

TAGS

antique wood floors best cleaning products for antique wood floors best hardwood floor cleaner for polyurethane best hardwood floor cleaners for deep stains cost of professional old hardwood floor cleaning cost to seal hardwood floors deep cleaning vs refinishing hardwood floors diy hardwood floor restoration tips hardwood finishes hardwood floor buffing and polishing cost hardwood floor maintenance schedule hardwood floor maintenance tips hardwood floor refinishing cost hardwood floor replacement cost hardwood floor restoration hardwood floor scratch repair kit hardwood floor scratch repair kits how often to reseal grout how often to seal grout how to clean antique hardwood floors how to fix scratches on hardwood floors how to fix water damaged hardwood floors how to maintain old hardwood floors how to prevent scratches on hardwood floors how to remove deep stains from hardwood how to remove scratches from hardwood floors how to repair scratches in old hardwood how to restore hardwood floors without sanding how to seal hardwood floors how to tell if hardwood floors need refinishing maintaining different types of hardwood finishes preventing scratches on hardwood floors professional carpet cleaning vs rental machines refinishing vs restoring refinishing vs restoring old hardwood floors refinish or replace hardwood floors removing pet stains from hardwood repair scratches replace old hardwood sealing hardwood floors sealing unsealed hardwood floors pros cons signs hardwood floors need replacing signs your hardwood floor needs resealing when to hire professional hardwood floor restoration when to replace old hardwood flooring