
- August 1, 2026
- in Blog
- by
- 96
- 0
Last Updated: August 1, 2026
When you’re selling a home, the listing photos are your first, and often only, chance to make an impression. Research from the National Association of Realtors shows that properties with professional photography sell 31% faster than those without. This is where knowing how to prepare home for listing photos becomes critical to your success. At Stay Fresh Steam Cleaning, we’ve worked with real estate agents across San Antonio who understand that the difference between a home that sits on the market and one that sells quickly often comes down to presentation.
The photographer’s job is to make your home look its best, but your job is to prepare the canvas they’re working with. A cluttered, dusty, or poorly lit space will look bad no matter how skilled the photographer is. The good news: most preparation work is straightforward, and it doesn’t require expensive renovations or professional staging.
Below, we’ll walk you through exactly how to prepare home for listing photos, seven concrete steps that have helped dozens of San Antonio homeowners present their properties in the strongest possible light.
Your home needs to feel like a blank canvas for potential buyers to imagine their own lives in it. Personal items, family photos, children’s artwork, religious symbols, memorabilia, pull the viewer’s eye away from the property itself and make it harder for them to envision themselves living there.
Walk through each room and remove:
This isn’t about erasing who you are; it’s about making the space feel like a blank slate. The photos should showcase the home, not the people living in it.
:::pro
Real estate agents report that homes with depersonalized spaces spend 40% less time on the market. Buyers need to see themselves in the space, and personal items prevent that mental projection.
:::
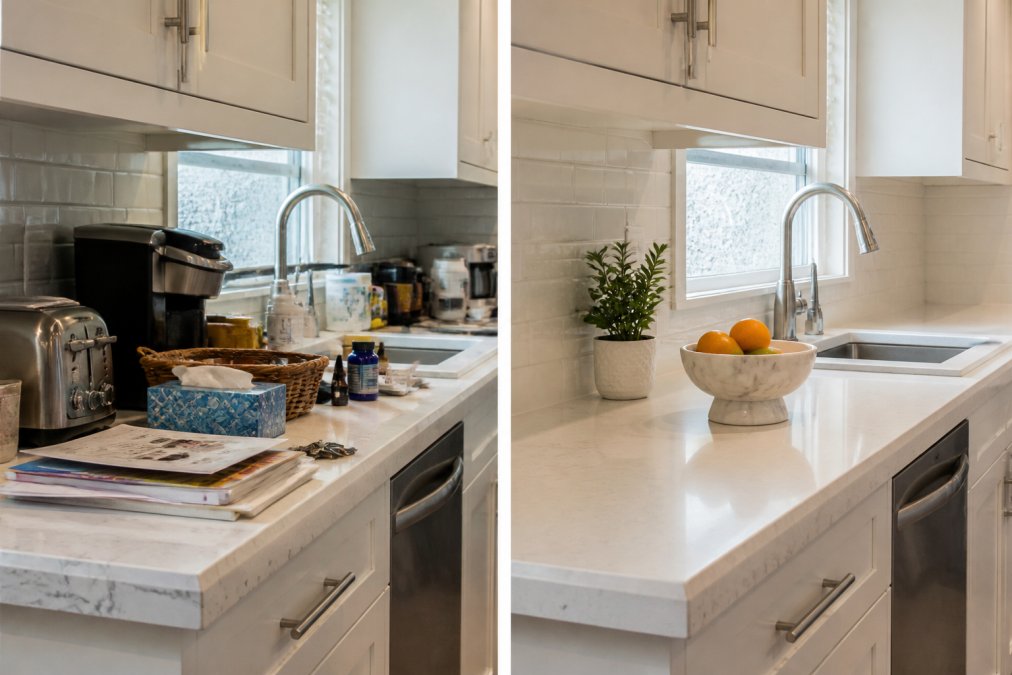
Kitchen and bathroom countertops are magnets for clutter, and they photograph prominently. Clear your counters to 80% empty. This includes:
A clean, minimal countertop makes the space feel larger and more upscale in photos. If you have a few high-end decorative items, a nice fruit bowl, a single plant, a designer candle, one or two strategically placed pieces can add warmth without clutter.
The floors in your home are one of the largest visual elements in any listing photo. A stained, dingy carpet or dull hardwood floor immediately signals neglect, even if the rest of the home is well-maintained. Professional photographers will capture flooring from multiple angles, so every surface matters.
For carpets, deep cleaning is essential. Regular vacuuming doesn’t remove embedded dirt, pet stains, or odors that potential buyers might notice. A professional steam cleaning service removes the buildup that makes carpet look tired and worn. If you have old stains that won’t come out, consider renting the space for a few days post-cleaning to let odors dissipate completely.
Hardwood and tile floors should be thoroughly cleaned and, if appropriate, polished. Dust and streaks are highly visible in photographs, especially under natural light. Stay Fresh Steam Cleaning utilizes advanced cleaning methods that revitalize tile and hardwood without damaging them, a critical concern for older homes where water damage is a risk.
Kitchens and bathrooms are the two most scrutinized rooms in any home listing. Buyers look closely at these spaces because they represent major renovation costs if anything is wrong. Ensure every surface shines:
Kitchen:
Bathroom:
These rooms photograph smaller than they are, so every detail is magnified. A single soap scum streak or dark grout line will be visible in the final photos and signal poor maintenance to buyers.
Natural light is the photographer’s best friend, and it’s free. But it only works if windows are clean and unobstructed. Dirty windows diffuse light and make rooms feel dim and dingy in photos.
Before the photo shoot:
Rooms photographed during midday with full natural light look larger, brighter, and more inviting. If your photo shoot is scheduled for late afternoon or cloudy weather, discuss this with your photographer in advance. They may recommend supplemental lighting.
Even with natural light, interior fixtures matter. A single burned-out bulb in a ceiling fixture or lamp is immediately visible in photos and signals neglect. Replace every bulb before the shoot, and consider upgrading to warm white bulbs (2700K color temperature) rather than cool white. Warm light feels more inviting in photos.
Ensure all fixtures are clean, dust on light fixtures is surprisingly visible in bright photos. Wipe down lampshades, clean ceiling fixtures, and polish any brass or chrome hardware around lighting.
If a room lacks natural light (like a basement bedroom or interior bathroom), the photographer will rely entirely on artificial light. Make sure those spaces are as bright as possible without looking harsh.
The first photo potential buyers see is often the front of the home. This "hero shot" sets the tone for the entire listing. A well-maintained exterior signals that the home has been cared for inside and out.
Before photos, ensure:
If your property has significant landscaping issues, consider hiring a professional landscaper for a day of cleanup before photos. This investment often pays for itself by reducing time on market.
Virtual staging has become increasingly popular as an alternative to physical staging, especially for vacant homes or homes with sparse furniture. A virtual staging service uses photo editing to digitally add furniture, décor, and finishing touches to empty rooms.
The advantage: you don’t have to rent furniture or hire a professional stager. The disadvantage: buyers know it’s digital, and they expect the in-person showing to match the photos. Virtual staging works best as a supplement to physical staging, not a replacement.
If you’re using virtual staging, be transparent about it in the listing. Use it for rooms that are genuinely empty or underutilized, not to hide existing problems. A virtually staged living room in an otherwise well-presented home can help buyers envision the space. A virtually staged kitchen in a home with visible wear tells a different story, one of deception.
For most San Antonio homes, physical staging is more effective. A clean, decluttered, well-lit room photographs better than an empty one, even without professional furniture rental.
Living rooms and open floor plans are the heart of modern homes, and they’re the spaces buyers spend the most time studying in photos. These rooms need to feel spacious, welcoming, and functional.
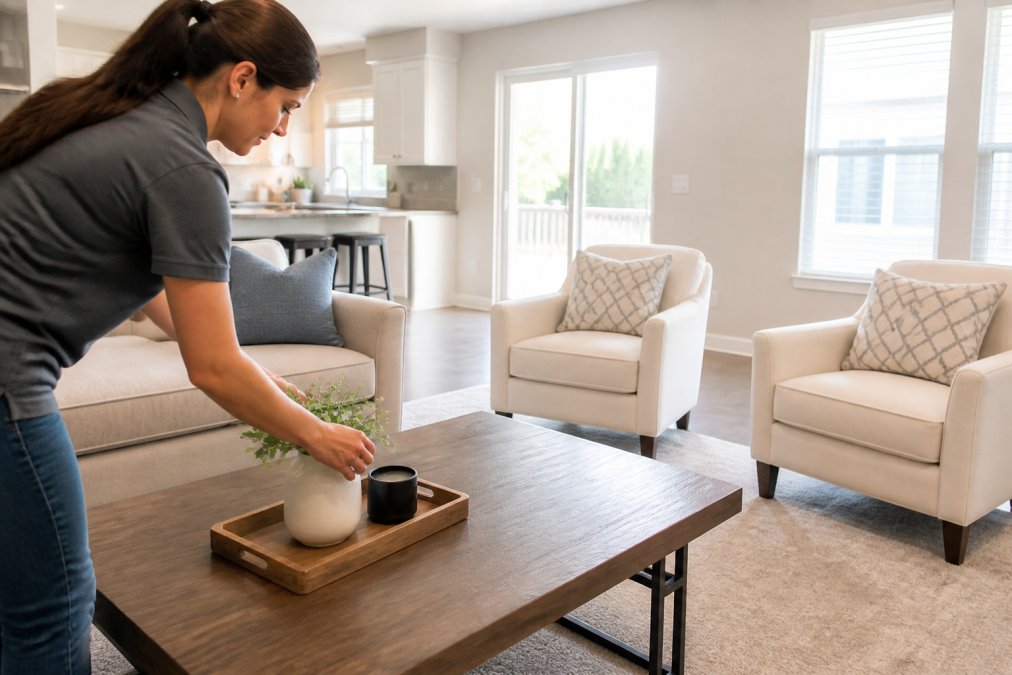
If you have furniture, arrange it to show the room’s flow and purpose. Furniture pushed against walls makes a space feel larger in photos. Avoid blocking windows or natural light sources. If a room feels too sparse with your current furniture, consider renting a few key pieces, a sofa, a dining table, a couple of accent chairs, just for the photos.
Arrange furniture to create conversation areas and show how the space is meant to be used. An empty living room feels cold; a thoughtfully staged one feels inviting.
Bedrooms should feel calm and spacious. Make beds neatly with high-quality linens (white or neutral tones photograph best), and remove excess pillows and throws. A bedroom should look restful, not cluttered.
Guest bedrooms should be styled as if they’re ready for visitors, clean, minimal, and inviting. Master bedrooms should feel like a retreat, not a storage room.
Remove all personal items, including family photos, children’s artwork, and memorabilia. Closet doors should be closed, and any visible storage should be organized.
The night before your photos, do a final walkthrough. This is your chance to catch anything the photographer might notice that you’ve overlooked.
Check:
If you notice anything, fix it now. Don’t assume the photographer will work around it or that it won’t show in photos.
On the morning of the shoot, open all curtains and blinds to maximize natural light. If the weather is clear, you’re in good shape. If it’s overcast, the photographer will adjust their approach, but natural light will be softer and less dramatic.
After the photos are done, you can restore your home to normal living. But resist the urge to immediately move furniture back or bring clutter out. Your photos will be live within 24-48 hours, and potential buyers will be scheduling showings.
Keep the home in "showing condition" for at least the first two weeks of listing. This means:
Many buyers will schedule showings within the first week of listing, when interest is highest. Homes that photograph well and show well sell faster. Stay Fresh Steam Cleaning can help maintain that showroom condition with professional deep cleaning services between showings, especially important if you have pets or high-traffic areas.
Preparing your home for listing photos isn’t about perfection; it’s about presentation. The goal is to remove distractions and let potential buyers see the home’s best features. Clean, bright, decluttered spaces photograph well and sell faster. If you’re managing rental properties or preparing multiple homes for listing, professional cleaning services save time and ensure consistency. Stay Fresh Steam Cleaning has helped San Antonio real estate agents and property managers prepare homes for photos by providing deep carpet cleaning, tile restoration, and hardwood floor care that makes spaces look move-in ready. Contact Stay Fresh Steam Cleaning to discuss how professional cleaning can support your listing strategy.
Preparation typically takes 3-7 days, depending on your home's current condition. Deep cleaning interior surfaces, decluttering, and staging furniture usually require the most time. If you hire professional cleaners, you can compress the timeline to 2-3 days. Schedule your photo session at least one week after beginning prep to allow time for thorough work and any touch-ups needed.
Remove personal items like family photos, personal collections, and memorabilia to depersonalize spaces. Clear countertops of appliances, clutter, and personal effects. Hide pet food bowls, litter boxes, and pet beds. Remove excess furniture to create a lived-in look without feeling cramped. Close closet doors and remove visible items from shelves. These removals help buyers envision themselves in the space rather than focusing on your belongings.
Natural light is ideal for listing photos, it creates warmth and showcases the property authentically. Open all window treatments to maximize natural light during the photo session. Ensure interior lighting fixtures are clean and free of burnout bulbs; replace any dim or flickering lights before the shoot. Avoid harsh shadows by scheduling photos during midday or golden hour. The photographer's perspective matters: they'll position shots to capture the best lighting angles and use wide-angle lenses to showcase open floor plans in natural light.
Yes, staging is essential for listing photos. Arrange furniture to emphasize visual flow and open floor plans. Use neutral decor to appeal to a broader audience. Add simple touches like fresh flowers or throw pillows to create aesthetic appeal without looking over-staged. Consider virtual staging for empty rooms if physical staging isn't feasible. Professional staging combined with high-resolution photography significantly impacts property value perception and first impressions.
Start with deep cleaning of all interior surfaces: carpets, hardwood floors, tile, and upholstery. Focus on kitchens and bathrooms, these rooms heavily influence buyer decisions. Clean windows, fixtures, and ceiling fans to remove dust. Professional steam cleaning for carpets removes deep stains and odors that affect the lived-in look. Ensure countertops are spotless and appliances shine. Pay attention to baseboards, light switches, and door handles. High-resolution photos reveal every detail, so thorough cleaning is non-negotiable for property presentation.
Physical staging involves arranging real furniture and decor in your home before photos are taken. Virtual staging uses digital tools to add or modify furniture and decor in photos after they're shot. Virtual staging is cost-effective for empty rooms and allows flexibility, you can show multiple design options. Physical staging creates authentic textures and lighting but requires more effort and expense. Many real estate professionals combine both: physically stage key rooms and use virtual staging for empty spaces to maximize property value in listing photos.
Conduct a final walkthrough from the photographer's perspective. Check that natural light flows through all rooms during the scheduled photo time. Verify that no burnout bulbs remain in fixtures. Ensure countertops are completely clear and flooring is spotless. Confirm that window treatments are open to showcase views. Test that ceiling fans are dust-free and furniture arrangement creates good visual flow. Take test photos with your phone to spot any issues you might have missed. If you've hired professional cleaners, schedule the photo session within 24 hours of their work for optimal results.
This article was written using GrandRanker


