
- July 28, 2026
- in Blog
- by
- 71
- 0
Last Updated: July 24, 2026
Learning how to safely clean old hardwood floors requires understanding the specific vulnerabilities of aged wood and the finishes that protect it. At Stay Fresh Steam Cleaning, we’ve helped countless homeowners in San Antonio maintain their hardwood investment without causing damage. The difference between a floor that lasts another 50 years and one that deteriorates comes down to knowing what your wood can actually handle.
A 1920s floor with hand-rubbed shellac behaves completely differently than a 1990s floor with polyurethane. The cleaning methods that work for one can destroy the other. Below, we’ll show you exactly how to identify your floor’s finish type, select the right tools, and execute a cleaning process that preserves rather than damages your wood.
Before you touch a mop to your floor, you need to know what you’re working with. The finish on your hardwood determines everything: which cleaners are safe, how much moisture you can use, and whether certain techniques will cause irreversible damage.
Run your fingernail lightly across an inconspicuous area of the floor. If it leaves a mark that disappears when you rub it, you have wax or oil. If the mark remains, you likely have polyurethane or another hard plastic finish. Shellac, common on older floors, is somewhat soft and can be damaged by water.
Look at the wood grain under strong light. Polyurethane creates a plastic-like appearance and feels smooth with a slight sheen. Shellac has a warmer, more natural look and can feel slightly tacky if older. Wax finishes are dull and can be buffed to a shine.
The age of your home offers clues too. Floors installed before 1970 are likely shellac or wax. Floors from the 1970s-1990s are often polyurethane. Homes built after 2000 typically have modern polyurethane or water-based finishes. If unsure, test a small area with your chosen cleaner before committing to the entire floor.
Sealed wood has a protective barrier. Unsealed wood does not. This distinction changes everything about how you approach cleaning.
Most hardwood floors installed after 1950 are sealed. Sealed wood can tolerate some moisture without absorbing it into the grain. Unsealed wood is porous; water soaks in immediately and causes swelling, warping, and discoloration.
Test your floor’s sealing by placing a small drop of water on an inconspicuous spot. Watch for 30 seconds. If the water beads up and sits on the surface, your wood is sealed. If the water soaks in and darkens the wood, you have unsealed wood. Unsealed hardwood requires completely different cleaning methods and is rare in homes built after the 1960s.
The right tools prevent damage. Invest in quality equipment designed specifically for hardwood floors.
A microfiber dust mop traps dust and debris without scratching the finish. Use it daily on high-traffic areas and weekly elsewhere. Microfiber is superior to cotton because it electrostatically attracts particles rather than pushing them around.
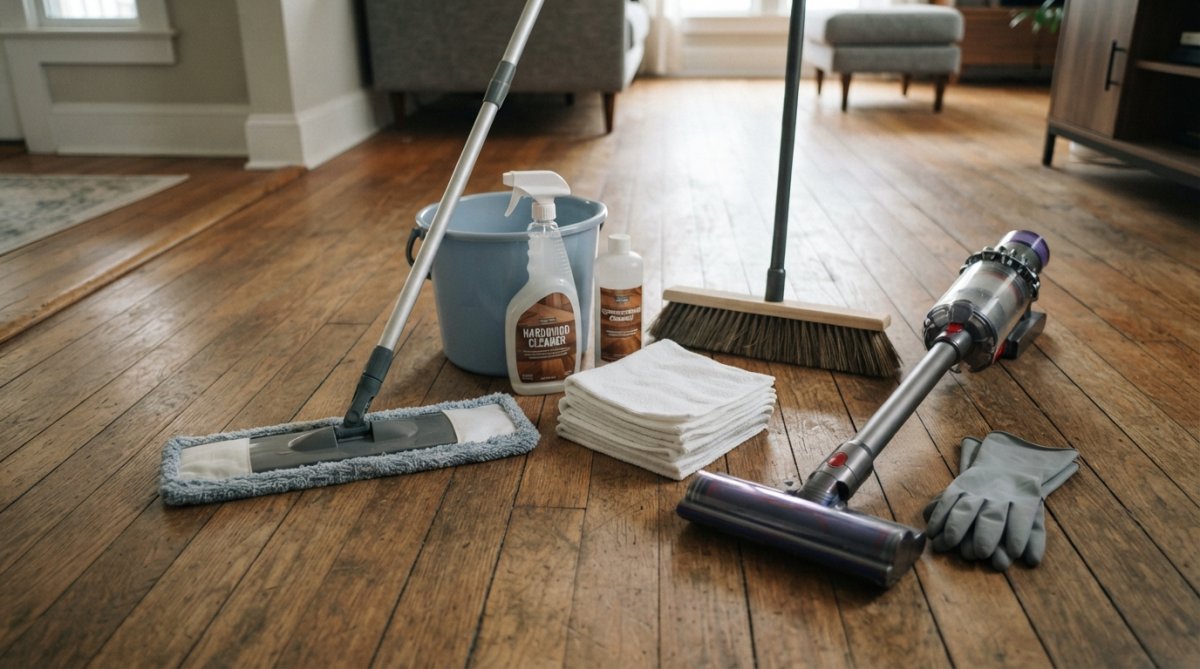
A soft-bristle brush handles debris in corners and along baseboards where a mop can’t reach. Hard bristles scratch finishes.
For damp mopping, use a microfiber mop head specifically designed for hardwood, not a sponge or string mop. Wring your mop until it’s almost dry before each pass. If you can hear water dripping, it’s too wet.
A soft cloth or microfiber rag handles spot cleaning and dried spills.
The pH of your cleaner matters more than the brand. Acidic or alkaline cleaners damage wood finishes. pH-neutral cleaners clean without harming the protective coating.
Commercial pH-neutral hardwood floor cleaners work well. Bona Hard-Surface Floor Cleaner is specifically formulated for sealed hardwood. Other reliable options include Minwax Hard Wood Floor Cleaner and Weiman Hard Wood Floor Cleaner. Follow dilution instructions exactly.
For a homemade solution, mix one part castile soap (like Dr. Bronner’s) with four parts water. This creates a mildly alkaline solution that cleans effectively without damaging the finish. Alternatively, mix one cup of rubbing alcohol with one gallon of water. The alcohol evaporates quickly, reducing moisture exposure.
Test any homemade solution on a small, hidden area first.
Remove all loose debris first. Vacuum with a soft-brush attachment or use a dust mop. Don’t use a regular vacuum cleaner; the hard wheels and brush roll can scratch finishes.
Walk the floor carefully and look for damage. Scratches, gouges, lifted edges, or soft spots indicate problems that cleaning won’t fix. Check for water damage: dark stains, warping, or musty smells require professional attention before cleaning.
Look for wax buildup. If the floor looks dull and cloudy despite being clean, you likely have residue from previous cleaners. This buildup can only be removed by buffing or refinishing.
Unsealed hardwood demands extreme caution. Any moisture is a threat.
If your floor is unsealed, do not use any wet-cleaning method. Use only a dry dust mop or soft-bristle brush. For stubborn spots, use a barely-damp cloth wrung nearly dry, wipe once, and immediately dry the area with a separate dry cloth.
For stuck-on debris, use a soft plastic scraper, not metal. If your unsealed floor has significant soiling that dry methods can’t address, you need professional refinishing.
This process works for sealed hardwood floors. If you have unsealed wood, stick to dry methods only.
Total Time: 2-3 hours for a 1,000 square-foot floor
What You’ll Need:
Dust mops beat brooms. A microfiber dust mop traps particles and lifts them away from the floor. If you prefer sweeping, use a soft-bristle broom designed for hardwood.
Vacuuming works if you use the right attachment. Use the soft-brush upholstery attachment, never the motorized rotating brush. For high-traffic areas, dust mop daily. For the rest of the floor, once weekly is sufficient.
Moisture is the enemy of old hardwood. The key is minimal water and maximum evaporation.
Fill a bucket with diluted pH-neutral cleaner following product instructions. Dip your microfiber mop head into the solution, then wring it hard. Your mop should be damp, not wet.
Mop in the direction of the wood grain. Work in sections and dry each section immediately with a clean, dry cloth. Pay special attention to seams between boards; moisture seeping into seams causes swelling and warping. Wring your mop extra dry before mopping near seams.
For sealed wood, one pass with a damp mop is enough. Avoid using spray cleaners that you mist directly onto the floor.
For water stains, try a damp cloth with a tiny amount of white vinegar applied to the cloth, not the floor. If this doesn’t work, the stain has penetrated the finish and requires professional refinishing.
For scuffs and light scratches, rubbing alcohol on a cloth sometimes helps. Don’t rub aggressively.
For deep scratches and gouges, accept that they’re permanent without refinishing. For sticky residue, use rubbing alcohol on a cloth and let it sit for a minute before gently rubbing.
For pet accidents or spills that have soaked into the wood, professional restoration is the only option.
Most floor damage comes from well-intentioned but misguided cleaning methods.
Vinegar is acidic. It breaks down the protective finish on hardwood floors, causing the finish to become dull, cloudy, and eventually peel. This is especially true for polyurethane and shellac finishes.
Murphy Oil Soap is commonly recommended but leaves a residue that builds up over time, traps dust, and makes the floor look dull. The combination of vinegar and soap is worse than either alone.
pH-neutral cleaners work without this trade-off.
Wax buildup happens when you apply wax products repeatedly without removing the old layer. If your floor has wax buildup, don’t add more wax. Use a commercial wax stripper or hire a professional to buff and restore the finish.
Prevent future buildup by avoiding wax products altogether on sealed hardwood. Sealed finishes don’t need wax. If you have an older wax-finished floor (common before 1970), professional floor care services know how to strip old wax and apply new wax correctly.
Sometimes cleaning alone can’t restore a floor to acceptable condition.
High-traffic zones accumulate dirt and grime that regular cleaning can’t address. Increase the frequency of damp mopping in these areas to twice weekly.
If buildup is heavy, a professional deep cleaning service can help. According to the National Wood Flooring Association, professional deep cleaning can restore the appearance of hardwood floors without refinishing. Professional equipment and cleaning solutions are stronger than consumer products, and professionals know how to apply them safely to old wood.
Deep cleaning removes surface dirt and residue but doesn’t address scratches, gouges, or finish damage.
If your floor is genuinely old (pre-1920s), consider whether refinishing is appropriate. Some antique floors benefit from restoration rather than refinishing to preserve historical significance.
If refinishing is necessary, hire a professional. Old hardwood often has surprises that modern sanders can damage. The cost is significant, but it’s the only way to fully restore a severely damaged floor.
Use doormats at all entrances to stop dirt before it reaches the floor. Remove shoes in the house if possible. Use furniture pads under chair and table legs to prevent scratches.
Wipe up spills immediately. Control humidity by keeping indoor levels between 35-55%. Use a humidifier in dry winter months and a dehumidifier in humid summer months.
Dust mop or vacuum weekly. Damp mop monthly for sealed hardwood using pH-neutral cleaner.
Old hardwood floors are an investment worth protecting. The challenge isn’t just cleaning, it’s knowing which methods preserve the finish and which ones damage it. Stay Fresh Steam Cleaning specializes in hardwood floor care for San Antonio homeowners, and our certified technicians understand the nuances of sealed vs. unsealed wood, finish identification, and moisture management. We use pH-neutral cleaning solutions and techniques specifically designed to maintain the longevity of your hardwood investment. Contact us for a professional assessment of your floor’s condition and a customized cleaning plan that keeps your wood protected for decades to come.
Unsealed hardwood floors require extra caution due to their porous nature. Use minimal moisture, a barely damp microfiber mop works best. Avoid standing water and excess liquid. Dust mop first to remove debris, then use a pH-neutral cleaner diluted with water. Always dry the floor immediately after mopping to prevent moisture damage and wood grain swelling.
No, vinegar is not recommended for old hardwood floors. While it may seem like a natural cleaner, vinegar is acidic and can damage wood finishes like polyurethane and shellac. It also leaves residue that builds up over time. Stick to pH-neutral cleaners specifically designed for hardwood to protect your floor's finish and longevity.
Light cleaning with a dust mop should happen weekly to remove debris and prevent scratches. Damp mopping with a microfiber mop can be done every 2-4 weeks depending on foot traffic. High-traffic areas may need more frequent attention. Avoid excessive cleaning, as overexposure to moisture can damage unsealed or older hardwood, even with pH-neutral solutions.
For spot treatment, identify the stain type first. Use a slightly damp cloth with pH-neutral cleaner for water-based stains. For tougher stains, apply the cleaner to the cloth (not the floor) and let it sit briefly before wiping dry. Avoid scrubbing aggressively, which can damage the wood finish. If the stain penetrates the wood grain, professional refinishing may be necessary to restore the floor's appearance.
This article was written using GrandRanker


