
- October 3, 2026
- in Blog
- by
- 30
- 0
Last Updated: October 2, 2026
Sealing hardwood floors is the process of applying a protective finish that bonds to bare wood and shields it from moisture, dirt, and daily wear, which is why sealing hardwood floors matters so much. Homeowners weighing the sealing unsealed hardwood floors pros cons debate should know one thing up front: bare wood is not a finished floor, it is a sponge waiting for its first spill.
Raw wood absorbs whatever lands on it. Water swells the fibers, and repeated moisture exposure leads to cupping, warping, and permanent grain distortion. Dirt and grit work into the pores and become nearly impossible to remove without sanding. The U.S. Environmental Protection Agency’s indoor air quality guidance also notes that unfinished surfaces trap dust and allergens more readily than sealed ones. In short, an unsealed floor loses its looks and its structural stability at the same time.
Sealing pays off in two big ways: moisture control and everyday durability. A quality finish creates a barrier that keeps liquid on the surface instead of inside the grain, and it gives you a wear layer that takes the abuse your floor would otherwise absorb.
A sealed floor handles seasonal expansion and contraction far better than a bare one. In humid months, wood naturally takes on moisture and swells; dry winter air pulls it back. A finish slows that exchange at the surface, which reduces gapping and cupping over time. For pet-owning households, this barrier is the difference between a quick wipe-up and a stain that soaks in before you find the paper towels.
The top coat becomes the surface that scratches, not the wood itself. That matters because a scratched finish can be screened and recoated, while scratched bare wood usually needs a full sanding. Sealed floors also clean with a damp mop instead of specialty products, which saves both time and money.
Sealing is not a free lunch. The trade-offs show up in the air quality during application, the cure time, and the cost of getting the prep wrong.
Traditional oil-based finishes release VOCs, the volatile organic compounds that give fresh polyurethane its sharp smell. The EPA’s information on volatile organic compounds explains that these emissions can irritate eyes and airways, which is why ventilation matters during and after application. Water-based options cut VOC levels dramatically, but even they need a cure window. Plan on staying off the floor for at least 24 hours for light traffic and several days before moving furniture back.
Adhesion is where most DIY sealing jobs fail. Finish bonds to clean, properly sanded, completely dry wood. Skip the sanding, leave dust behind, or coat over a contaminated surface, and the film peels within a season. Fixing a failed coat means sanding it all off and starting over, which turns a weekend project into a multi-day one.
Water-based finish wins for most occupied homes, oil-based wins when you want a deep amber tone and can tolerate the smell. Both protect the wood; they differ in dry time, color, sheen control, and how they hold up over years of use. The table below is the quick version, and the notes underneath explain the trade-offs that actually decide the job.
| Feature | Water-Based Finish | Oil-Based Finish |
|---|---|---|
| Dry time between coats | 2-4 hours | 8-12 hours |
| Full cure | 3-7 days | 7-14 days |
| VOC level | Low | High |
| Color shift | Stays clear | Ambers over time |
| Sheen options | Matte, satin, semi-gloss, gloss | Satin, semi-gloss, gloss |
| Durability | Excellent, non-yellowing | Excellent, warmer tone |
| Recoat without sanding | Usually yes, within the recoat window | Usually yes, within the recoat window |
| Best for | Occupied homes, low odor | Traditional looks, budget |
Sheen is measured on a gloss scale, and it changes how a floor reads in a room more than the finish chemistry does. Matte finishes sit around 10-25 gloss units and hide dust, footprints, and light scratches, which is why they dominate in modern open-plan homes. Satin lands around 30-40 and is the most common compromise.
Solids content is the percentage of the can that stays on the floor after the solvent evaporates. A finish with 30% solids leaves a thinner film per coat than one with 45%, which means you need more coats to reach the same wear layer. Water-based finishes historically ran lower on solids, but modern waterborne formulas have closed much of that gap.
Every finish has a recoat window: the period during which the next coat will chemically bond without sanding. Miss the window and you have to abrade the surface to get a mechanical bond. Water-based finishes typically allow recoating within a few hours to overnight; oil-based finishes give you a longer window but a slower dry. This is why a water-based job can be finished in a single long day while an oil-based job stretches across two or three. For a deeper look at how finishes bond to wood, the U.S. Department of Agriculture’s Forest Service wood handbook is a solid technical reference.
The steps below assume a bare or freshly sanded floor. Rushing any of them causes the adhesion failures covered above.
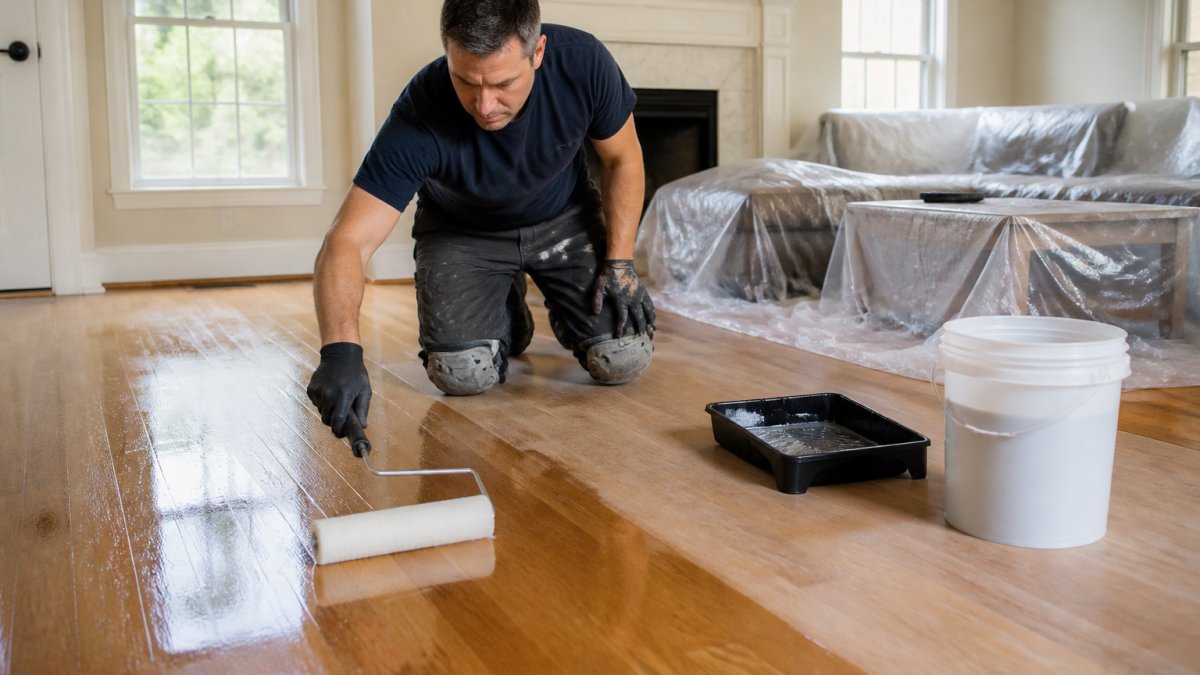
The cost to seal hardwood floors depends on square footage, finish choice, and who does the work. DIY keeps material costs low but puts the prep and adhesion risk on you. Professional sealing costs more up front but includes sanding, moisture testing, and a warranty on the work. The table below breaks down what each approach actually includes.
| Approach | What’s Included | Time | Risk Level |
|---|---|---|---|
| DIY | Materials, tools, your labor | 2-4 days | High (adhesion, cure) |
| Professional | Sanding, moisture testing, finish, warranty | 2-3 days | Low (warranty) |
Four variables move the number more than anything else:
The material savings from DIY are real, but they are only a savings if the coat holds. A failed finish, peeling, hazing, or poor adhesion, has to be sanded off and redone, which means buying materials twice and losing the room twice. For a rental property or a commercial space, that second round of downtime is usually the most expensive part of the job.
DIY is a reasonable call when the floor is small, already sanded, and you have the time to prep carefully and let it cure. It is a poor call when the floor is large, has existing wax or polish residue, or sits in a space that cannot be taken out of service for a week.
For rental properties and commercial spaces, downtime matters more than the labor difference. A failed DIY coat means the space sits empty twice. If you are weighing the trade-off, call Stay Fresh Steam Cleaning for a floor assessment.
Resealing is due when the finish, not the wood, is showing wear. Watch for these signals:
If a single drop of water leaves a dark mark within a minute, the wear layer is gone. Catching it at that stage means a light screen and recoat. Waiting until the wood itself is exposed means sanding the whole floor.
Sealing unsealed hardwood floors comes down to a simple trade: a few days of odor and downtime in exchange for years of moisture protection and scratch resistance. The cons are real but manageable, and the adhesion risk disappears when the prep is done right. If you would rather not gamble on that prep, Stay Fresh Steam Cleaning offers professional hardwood maintenance with certified technicians, background-checked staff, and a satisfaction guarantee. Contact us.
Yes. Unfinished hardwood is porous and absorbs spills, dirt, and humidity, which leads to warping, stains, and surface damage. A sealer creates a protective barrier that blocks moisture and everyday wear. Without it, even minor water exposure can cause long-term problems. Sealing also makes cleaning easier and extends the life of the floor, so most flooring professionals recommend sealing any bare wood before regular use.
Unsealed wood swells and cups when exposed to moisture, and gaps can open as humidity changes. Dirt and grit work into the grain, acting like sandpaper underfoot and wearing the surface unevenly. Stains from pets, food, or drinks set quickly and become hard to remove. Over time, the wood may need sanding and refinishing sooner than if it had been sealed, which raises the cost of ownership.
The cost to seal hardwood floors depends on square footage, floor condition, finish type, and whether you hire a professional. DIY material costs are lower but require sanding equipment and time. Professional sealing typically includes surface prep, application, and curing guidance. For an accurate estimate, contact a flooring specialist who can assess your specific floors and provide a quote based on your home’s square footage and finish choice.
Watch for dull patches, visible scratches, dark spots where water has soaked in, and a floor that feels rough instead of smooth. If a drop of water beads on the surface, the finish is still working; if it soaks in within minutes, it is time to reseal. High-traffic areas like hallways and kitchens usually show wear first. Resealing before the bare wood is exposed prevents deeper damage and costly refinishing.
You can apply a maintenance coat over a clean, intact finish without sanding, but that only works if the existing sealer is fully bonded and not peeling. For unsealed or worn floors, light sanding or screening is required so the new finish can grip the wood. Skipping this step causes adhesion failure, peeling, and uneven sheen. A quick test: if the old finish flakes off when scraped, sanding is necessary before sealing.


