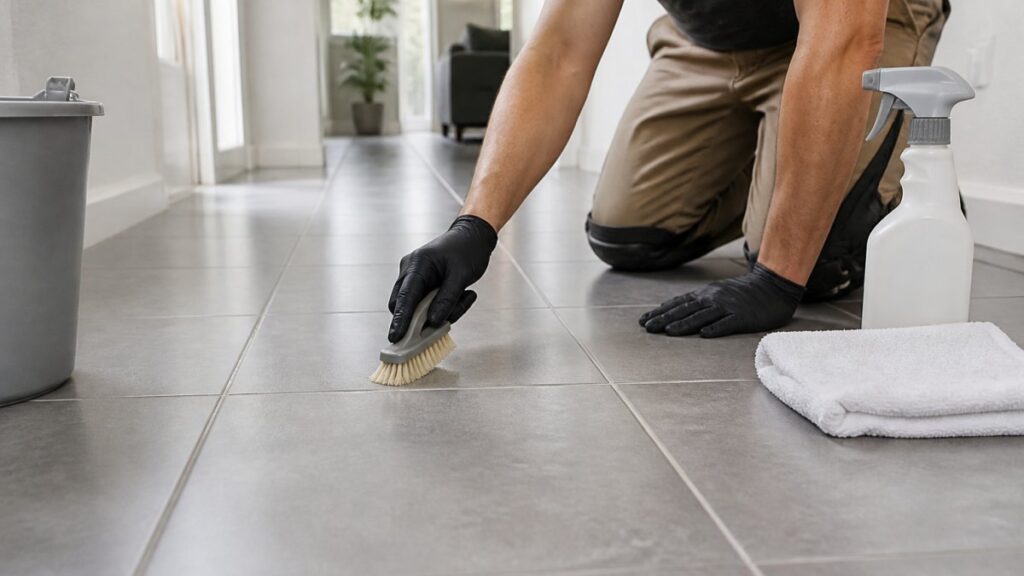
Preventative Grout Maintenance for High-Traffic Rentals

Preventative Grout Maintenance for High-Traffic Rentals

  • October 8, 2026
  • in Blog
  • by

Table of Contents

Last Updated: October 8, 2026

Why Preventative Grout Maintenance Matters for Rental Properties

Grout fails silently. By the time water seeps through, stains spread, or tenants complain about mold, you’re facing expensive repairs.

Stay Fresh Steam Cleaning helps property managers and landlords treat grout maintenance as a scheduled process rather than a crisis response.

Here’s what most owners miss: grout isn’t just cosmetic, it’s a barrier.

Rental Property Tile Maintenance Checklist: Daily and Weekly Tasks

Consistency beats intensity. Small, regular actions prevent the buildup that leads to permanent damage. Your rental needs two levels of maintenance: daily spill response and weekly deep cleaning.

Daily spill response and spot cleaning

Respond to spills fast. Water left on grout absorbs into the pores, stains set, and mold grows.

Train tenants and guests on spill cleanup. Post simple instructions in bathrooms and kitchens.

For your own inspections, keep these items on hand:

  • Microfiber cloths (absorbent, reusable)
  • Mild dish soap and water
  • Squeegee for wet areas

Wipe spills immediately and squeegee bathrooms after showers. Don’t let water pool on grout lines, this habit prevents mold and staining.

Weekly deep cleaning routine

Once a week, spend 15 minutes on deeper grout cleaning to remove dirt before it hardens and stains.

For high-traffic areas, make the weekly routine non-negotiable. Bathrooms and kitchen tile get dirty faster and need attention every seven days.

Weekly cleaning also surfaces early warning signs, cracks, discoloration, or areas where water beads differently, so you can prevent costly repairs.

How Often to Seal Grout and Reapplication Timing

Sealing is the highest-leverage preventative task for rental grout, but “seal every few years” is not a schedule. The right interval depends on grout type, traffic, moisture, and cleaner.

Match the sealer to the grout type

Not all grout accepts the same sealer. The wrong product wastes money and can leave a film that traps dirt.

  • Cement-based grout is porous and takes a penetrating sealer well. Penetrating sealers soak into the pores and repel water from within. This is the standard choice for most rental tile floors, backsplashes, and tub surrounds.
  • Epoxy grout is dense and largely non-porous. It often needs no sealer at all, and some manufacturers advise against sealing it. If you seal epoxy, use a product labeled for epoxy grout and confirm with the manufacturer first.
  • Urethane grout behaves closer to epoxy. Check the manufacturer’s guidance before applying anything.

A common pattern is to seal cement grout and leave epoxy and urethane alone unless the manufacturer says otherwise. Confirm the grout type before buying sealer; if unsure, test in an inconspicuous spot.

Test before you seal, not after

The water test tells you whether the sealer still works. Here’s a repeatable version:

  1. Dry the grout line with a clean cloth.
  2. Drop about a teaspoon of water onto the grout in a high-traffic zone.
  3. Wait 10 minutes.
  4. If the water beads and sits on the surface, the sealer is intact. If it darkens the grout and soaks in, the sealer has failed.

Run this test in the same spots each time: high-traffic zones monthly; low-traffic areas quarterly.

Pro Tip
Photograph the water test each time. A dated photo of beading versus absorbing water is the fastest way to justify resealing to an owner or to schedule it before a turnover.

A resealing schedule by grout type and traffic

Use these ranges as starting points, then adjust based on water test results:

  • Cement grout, high-traffic (kitchen, entry, bathroom floor): reseal every 12-18 months.
  • Cement grout, moderate traffic (hallways, living areas): reseal every 18-24 months.
  • Cement grout, low traffic (guest bath, spare room): reseal every 24-36 months.

Several factors shorten these intervals:

  • Harsh cleaners. Acidic or high-alkaline cleaners break down sealer faster. If your cleaning crew uses a strong product weekly, expect to reseal sooner.
  • Steam and moisture. Bathrooms and laundry areas wear sealer faster than dry rooms.
  • Heavy turnover. Short-stay rentals with frequent cleaning cycles erode sealer faster than long-term leases.

Application steps that protect the sealer

  1. Clean the grout thoroughly and let it dry completely. Sealer over dirt or moisture traps both.
  2. Apply a penetrating sealer in thin, even coats with a small foam brush or applicator along the grout lines.
  3. Wipe excess sealer off the tile surface before it dries, or it will leave a haze.
  4. Let it cure per the product label. Many penetrating sealers need 24-48 hours before water exposure, so schedule resealing around turnovers, not during them.
  5. Re-test with the water test after curing to confirm the sealer took.
Watch Out
Do not seal new grout until it has fully cured. Most cement grout needs about 72 hours, but humid conditions and thick joints can extend that. Sealing too early traps moisture and weakens the grout.

Build resealing into the budget and calendar

Resealing is predictable, so treat it as a scheduled expense. Add a resealing line to each property’s annual maintenance budget and put the next reseal date in your turnover spreadsheet. When the water test fails or the interval arrives, reseal before the next guest checks in, a worn sealer is where small stains become permanent and water reaches the substrate.

Best Grout Cleaner for High-Traffic Floors: Methods and Products

Not all cleaners work on all grout. The wrong product can damage grout or leave residue that attracts dirt, so match your method to the grout type and tile material.

Safe cleaning products for grout type and tile material

Cement-based grout is porous and stains easily but responds to gentle cleaners.

Epoxy grout is harder, less porous, and more stain-resistant than cement grout. Slightly stronger cleaners are fine, but avoid abrasive scrubbing.

Never mix cleaners. Combining bleach and ammonia creates toxic fumes (the CDC). Stick to one product at a time.

Pressure washing and professional cleaning

Pressure washing is tempting for turnovers, it’s fast and looks effective, but high pressure damages grout, forcing moisture into the substrate and dislodging tiles.

Use low-pressure washing only, keep the nozzle moving, and never let pressure concentrate on one area. Better yet, save pressure washing for outdoor tile.

For serious stains or heavy buildup, professional cleaning is worth it.

Signs Grout Needs Resealing: Early Detection and Inspection

Catch grout problems early, once damage spreads, repairs get expensive. Learn the signs that resealing is overdue or deeper damage is developing.
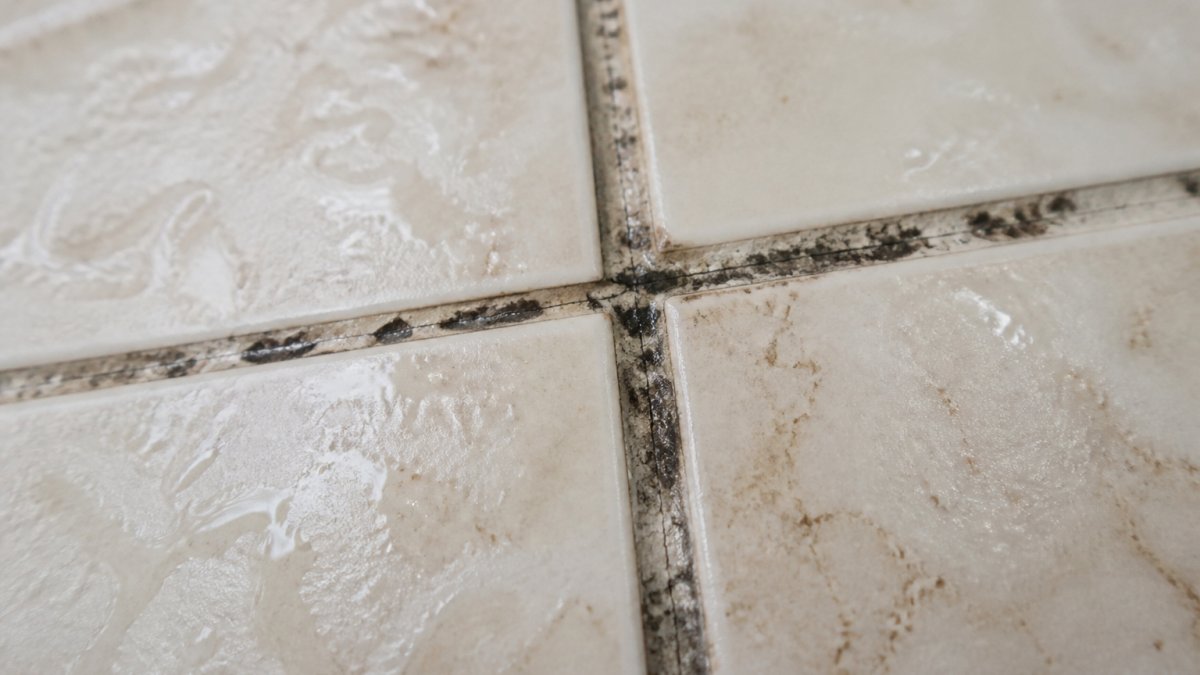
Infographic showing signs of wear like cracks and mold for preventative grout maintenance in bathrooms.

Visual indicators of wear and damage

Discoloration is the first sign. Grout darkens as it absorbs dirt and water.

Contact Us →

Cracks in grout lines are serious.

Crumbling or missing grout is an emergency, if grout is disappearing, tiles will loosen, so act immediately.

Efflorescence, white, chalky deposits on grout, means water is moving through the substrate. This indicates moisture problems behind the tile.

Water absorption and mold prevention

Do the water test regularly in different areas, testing high-traffic zones monthly. If water absorbs instead of beading up, resealing is due.

Mold is a health hazard and a common tenant complaint that grows in damp grout.

Mold in bathrooms often means inadequate ventilation. Ensure exhaust fans run during and after showers. Improve air circulation. Dry the area regularly.

Turnover Inspection and Documentation Workflow

Turnover is the only reliable window to catch grout damage before the next guest arrives. A repeatable workflow, a consistent checklist, dated photos, and a log, turns it into a record you can act on and defend.

The pre-turnover grout checklist

Walk every tiled area, checking each item and noting its location and condition.

  • Stains: discoloration that weekly cleaning does not remove.
  • Cracks: hairline or larger cracks in grout lines.
  • Missing or crumbling grout: gaps where grout has fallen out.

Prioritize bathrooms, kitchens, entryways, and any tiled floor with daily foot traffic, these wear and fail first.

Photograph before and after

Photos are the backbone of the workflow. Take them the same way every time so comparisons are meaningful.

  1. Before cleaning: photograph each tiled area from a standing position, then take a close-up of any stain, crack, or missing grout.
  2. After cleaning: repeat the same angles. Same distance, same lighting where possible.
  3. Compare: place before and after side by side. If the area cleaned up well, you likely only need resealing. If damage remains visible after cleaning, repair or regrouting is the next step.

Use a simple naming convention so photos sort in order: property address, date, area, and stage. Naming files for the property, date, bathroom, and “before” or “after” keeps the sequence clear.

Pro Tip
Store photos in a dated folder per property and back them up off-site. Dated before-and-after images are the clearest proof of condition if a tenant disputes a damage claim.

Keep a grout maintenance log

A one-row-per-event log turns scattered notes into a maintenance history. Record:

  • Date of inspection
  • Area inspected
  • Condition notes (stains, cracks, missing grout, mold)

After a few turnovers, patterns emerge: which areas stain first, which need resealing sooner, and which trend toward regrouting. That history lets you schedule work instead of reacting to it.

Decide: clean, reseal, repair, or regrout

Use inspection results to route each area:

  • Clean only: light soil that comes out with routine cleaning.
  • Reseal: grout is intact but the water test shows absorption.
  • Repair: cracks, missing grout, or loose tiles in a limited area.
  • Regrout: widespread crumbling, repeated mold, or moisture damage across a large area.
Key Takeaway
A documented turnover workflow does three things at once: it catches damage early, it creates a defensible record for deposits and disputes, and it builds the history you need to predict resealing and repair costs instead of absorbing them as surprises.

Hand off to the next guest cleanly

Once inspection and any resealing or repair are done, note the next reseal date in the log and the property’s maintenance calendar. The next turnover then starts from a known baseline, that continuity separates a preventative program from one-off cleaning.

Tenant and Guest Spill-Response Instructions

Most grout damage comes from neglected spills: a stain that sits for hours sets permanently, and a spill left for days lets water penetrate and weaken grout.

Post a one-page guide in each bathroom and the kitchen. Keep it simple:

Immediate Response to Spills:

  • Wipe up liquid immediately with a cloth or paper towel
  • Use a squeegee to remove excess water from tile
  • Dry the area completely with a clean cloth

For Stains:

  • Blot, don’t rub (rubbing spreads the stain)
  • Use warm water and mild soap
  • Rinse thoroughly
  • Dry completely

What NOT to Do:

  • Don’t use vinegar or bleach on grout
  • Don’t use abrasive scrubbing pads
  • Don’t let water sit on grout lines

When to Call:

  • If a stain doesn’t come out with mild soap and water
  • If you see cracks in grout
  • If you notice mold or mildew

This simple guide prevents most tenant-caused damage. Tenants who understand that quick action prevents staining are more likely to act.


Preventative grout maintenance for high-traffic rentals protects your investment and keeps turnover costs low.

Frequently Asked Questions

How often should grout be cleaned in a high-traffic rental?

In high-traffic rentals, grout should be spot-cleaned daily to address spills immediately and deep-cleaned weekly to prevent stain buildup. Monthly professional cleaning is recommended for busy properties with frequent guest or tenant turnover. The exact schedule depends on foot traffic volume and the type of stains common in your property. Properties with pets or heavy use may need more frequent attention.

How long does grout sealer last in a busy rental property?

Quality grout sealer typically lasts 1 to 3 years in high-traffic rentals, depending on foot traffic, moisture exposure, and the sealer type used. High-traffic areas may require resealing every 12 to 18 months, while lower-traffic zones can extend to 2 to 3 years. Regular inspection for water absorption and staining helps determine when resealing is needed. Professional application and maintenance of preventative grout maintenance practices extend sealer lifespan significantly.

What cleaning products are safe for tile grout in rentals with children and pets?

Use pH-neutral, non-toxic cleaners specifically formulated for grout and tile. Avoid bleach, acidic cleaners, and harsh chemicals that can damage grout and pose health risks. Commercial grout cleaners labeled as non-toxic and pet-safe are effective alternatives. Always test any cleaner on an inconspicuous area first, and ensure proper ventilation during cleaning to protect occupants.

When should grout be professionally cleaned or repaired in a rental?

Schedule professional grout cleaning for high-traffic rentals, or immediately after detecting heavy staining, mold, or mildew. Grout repair or regrouting is necessary when cracks appear, grout is missing, or water absorption increases significantly. Professional services are especially important during tenant or guest turnover to restore grout to like-new condition and document the property’s condition for liability protection.

LATEST POSTS
MOST POPULAR
TEXT WIDGET

What makes Cleanmate trusted above other cleaning service providers? When you combine higher standards, smarter strategies and superior quality all in one package, the result is top notch.

TAGS

antique wood floors best cleaning products for antique wood floors best hardwood floor cleaner for polyurethane best hardwood floor cleaners for deep stains cost of professional old hardwood floor cleaning cost to seal hardwood floors deep cleaning vs refinishing hardwood floors diy hardwood floor restoration tips hardwood finishes hardwood floor buffing and polishing cost hardwood floor maintenance schedule hardwood floor maintenance tips hardwood floor refinishing cost hardwood floor replacement cost hardwood floor restoration hardwood floor scratch repair kit hardwood floor scratch repair kits how often to reseal grout how often to seal grout how to clean antique hardwood floors how to fix scratches on hardwood floors how to fix water damaged hardwood floors how to maintain old hardwood floors how to prevent scratches on hardwood floors how to remove deep stains from hardwood how to remove scratches from hardwood floors how to repair scratches in old hardwood how to restore hardwood floors without sanding how to seal hardwood floors how to tell if hardwood floors need refinishing maintaining different types of hardwood finishes preventing scratches on hardwood floors professional carpet cleaning vs rental machines refinishing vs restoring refinishing vs restoring old hardwood floors refinish or replace hardwood floors removing pet stains from hardwood repair scratches replace old hardwood sealing hardwood floors sealing unsealed hardwood floors pros cons signs hardwood floors need replacing signs your hardwood floor needs resealing when to hire professional hardwood floor restoration when to replace old hardwood flooring