
- 20
- 0
Table of Contents
- Why Grout Starts Absorbing Water in the First Place
- Signs Your Grout Needs to Be Resealed
- The Grout Sealer Water Test: How to Check Yours at Home
- How Often to Reseal Grout in Showers, Kitchens, and Floors
- When to Regrout Tile Instead of Resealing
- How to Clean Sealed Grout Without Stripping the Sealer
- How to Tell Sealer Failure Apart From Dirt, Mold, or Grout Damage
- Conclusion: Test, Then Treat
- Frequently Asked Questions
Last Updated: October 12, 2026
Why Grout Starts Absorbing Water in the First Place
Grout is porous by nature, and that porosity is the root of every resealing question.
Epoxy grout cures dense and plastic-like, resists water on its own, and rarely needs sealing.
Here is what most homeowners miss: sealing does not make grout waterproof.
Showers are the harshest environment in any home: steam, standing water, and soap scum break sealers down faster than anything else.
Key Takeaway
Cement-based grout absorbs water. Epoxy grout does not. Before you buy any sealer, confirm which type you have, because the answer changes everything that follows.
Cement-based grout absorbs water. Epoxy grout does not. Before you buy any sealer, confirm which type you have, because the answer changes everything that follows.
Signs Your Grout Needs to Be Resealed
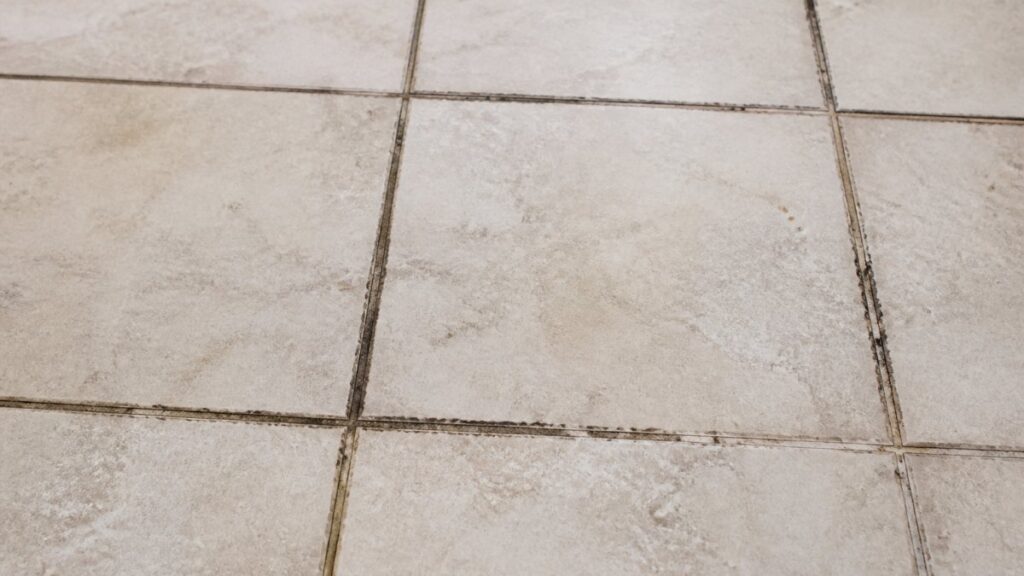
The clearest signs your grout needs to be resealed are dark, patchy grout lines that cleaning no longer fixes, grout that stays damp long after a shower, and visible cracking or crumbling along the joints. Any one means the sealer has worn through.
Discoloration That Won’t Lift After Cleaning
Grout that looks dirty even after a scrub is usually absorbing, not just stained on the surface, the difference between a cleaning problem and a sealing problem.
Try this test. Clean one grout line with your normal method and let it dry fully. If it lightens, the dirt sat on top.
Watch for patchy discoloration, too.
Cracking, Chipping, and Worn Grout Lines
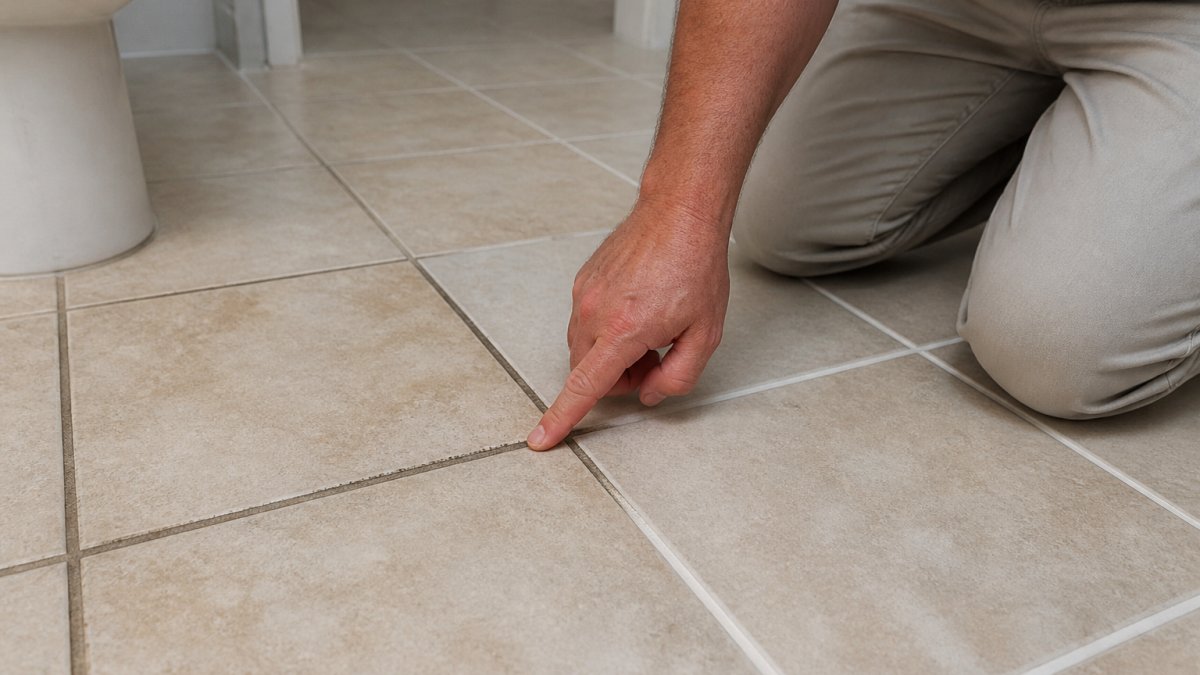
Small cracks and crumbles along the grout lines mean the material itself is breaking down, more serious than discoloration, because cracks let water straight through to the backing behind the tile.
A few hairline cracks in an older floor are common. But if grout chips out in chunks, or you can dig into it with a fingernail, resealing alone will not fix it.
The Grout Sealer Water Test: How to Check Yours at Home
The grout sealer water test tells you in about five minutes whether your sealer is still working. Drip a few drops of water onto a clean, dry grout line and watch.
Here is how to run it properly:
- Clean the grout line and let it dry completely, at least an hour.
- Drop a small amount of water onto the grout with a spoon or dropper.
- Wait five minutes and look at the water.
- If it beads up and sits on top, your sealer is holding.
- If the water darkens the grout and soaks in, the sealer has failed.
The water test beats guesswork every time. Most people assume their grout is fine because it looks light-colored, then discover it drinks water like a sponge.
Watch Out
Do not run the water test on grout you just cleaned with a harsh product. Some cleaners leave a residue that makes water bead up even when the sealer is gone. Rinse well and let it dry before testing.
Do not run the water test on grout you just cleaned with a harsh product. Some cleaners leave a residue that makes water bead up even when the sealer is gone. Rinse well and let it dry before testing.
How Often to Reseal Grout in Showers, Kitchens, and Floors
There is no single resealing schedule that fits every tile surface, because the sealer wears down at different rates depending on water, traffic, and cleaning chemistry. The intervals below are starting points, not rules, always confirm with the water test first.
| Area | What Wears the Sealer Down | Check Frequency | Typical Reseal Window |
|---|---|---|---|
| Shower walls | Steam, soap scum, daily spray | Every 3-6 months | 6-12 months |
| Shower floor | Standing water, body weight, squeegee abrasion | Every 3 months | 6-9 months |
| Kitchen floor | Foot traffic, chair drag, frequent mopping | Every 6-12 months | 12-18 months |
| Bathroom floor | Humidity, towel drag, occasional standing water | Every 6-12 months | 12 months |
| Backsplash | Splash, wiping, low abrasion | Every 12 months | 18-24 months |
| Entryway or mudroom | Grit, salt, heavy foot traffic | Every 6-12 months | 12-18 months |
| Low-traffic tile (walls, ceilings) | Dust, occasional wipe-down | Every 18-24 months | 24 months or longer |
Why Showers Wear Sealers Fastest
A shower floor can see standing water for 20 minutes or more every day, working into any pinhole in the sealer and pushing it out of the pores. Add alkaline soap scum and body oils, and the sealer breaks down from both chemistry and moisture. Shower floors need attention far more often than shower walls, even in the same room.
Why Kitchen Floors Are a Different Problem
Kitchen grout rarely sits under standing water, but it takes a beating from foot traffic and mopping. Grit dragged across the floor acts like sandpaper on the sealer, and harsh cleaners strip it chemically. Mop daily with vinegar or bleach and expect the sealer to fail in half the normal time.
The Check-First Rule
A fixed calendar is the most common mistake. If your sealer still beads water, resealing is wasted effort and money. Test first, then decide: a shower that passes in month 9 does not need resealing just because the calendar says so, while a kitchen floor that fails at month 8 needs it early.
Key Takeaway
Showers need the most frequent checks because of standing water and soap scum. Kitchen floors need checks because of abrasion and cleaner chemistry. Backsplashes and low-traffic walls can go much longer. Test before you reseal, every time.
Showers need the most frequent checks because of standing water and soap scum. Kitchen floors need checks because of abrasion and cleaner chemistry. Backsplashes and low-traffic walls can go much longer. Test before you reseal, every time.
Room-by-Room Signs That You Are Past Due
- Shower floor: grout stays dark after the shower dries, or water pools on the grout instead of beading.
- Shower walls: white or gray film that returns within days of cleaning, especially near the soap dish.
- Kitchen floor: grout lines near the sink or dishwasher look darker than grout in the middle of the room.
If you see any of these, run the water test on that area before you buy sealer. It tells you whether the sealer is gone or whether you are looking at dirt, mold, or grout damage.
When to Regrout Tile Instead of Resealing
Resealing protects healthy grout. It cannot rebuild grout that is crumbling, missing, or hollow. The hard part is telling a sealer problem from a grout problem, because the symptoms overlap: dark grout could be dirt, mold, sealer failure, or grout breaking down, and each has a different fix.
The Four-Part Diagnostic
Run this sequence before you buy sealer or call a contractor.
Step 1: Clean a test line. Clean one dark grout line with a pH-neutral tile and grout cleaner and a soft brush, then let it dry fully.
Step 2: Run the water test. Drip water on the cleaned, dry line.
Step 4: Probe the grout. Press a fingernail or plastic scraper into the grout line.
Signs That Resealing Will Not Be Enough
- Grout that crumbles or falls out when you touch it
- Deep cracks that run through the full depth of the line
- Soft or spongy spots where water has worked behind the tile
If you see any of these, the fix is grout repair or full regrouting. Sealing over failing grout traps moisture and makes the problem worse. Once the new grout cures, seal it to protect the fresh work.
What Regrouting Actually Involves
Regrouting means removing the old grout to about two-thirds of the tile thickness, cleaning the joint, and packing in new grout.
Epoxy grout is different: it is dense and resists water on its own, so it rarely needs sealing. If epoxy grout is failing, the repair is more specialized and usually best handled by a tile contractor.
Sealer Compatibility Matters
Not every sealer works on every grout. Penetrating sealers soak into cement-based grout and are the most common type for residential tile; topical sealers form a surface film that can peel or discolor. With epoxy grout, check the manufacturer’s guidance first, because many epoxy grouts do not need a sealer and some sealers will not bond.
Watch Out
Do not seal grout that is still curing, damp, or contaminated with cleaner residue. Sealer applied over moisture or residue will fail early and may discolor. Clean, rinse, dry, and confirm the grout is fully cured before sealing.
Do not seal grout that is still curing, damp, or contaminated with cleaner residue. Sealer applied over moisture or residue will fail early and may discolor. Clean, rinse, dry, and confirm the grout is fully cured before sealing.
The Bottom Line
Dark grout is not automatically a resealing problem. Clean it, test it, probe it, and check for mold. Only reseal when the grout is healthy and the sealer has failed. Repair or regrout when the grout itself is breaking down. The wrong fix wastes money and can make the damage worse.
How to Clean Sealed Grout Without Stripping the Sealer
The wrong cleaner will strip your sealer faster than foot traffic ever could. Bleach, vinegar, and harsh acidic or abrasive products break down sealers, which is why some grout needs resealing long before it should.
Clean sealed grout with these habits instead:
- Use a pH-neutral cleaner made for tile and grout
- Skip vinegar, bleach, and ammonia on sealed lines
- Use a soft brush, never a stiff wire brush
For routine maintenance, warm water and a mild cleaner handle most messes. Save heavy scrubbing for grout that is already damaged and due for repair.
Pro Tip
If you are not sure what is safe on your sealer, test a small hidden area first. Apply your cleaner to one grout line near a corner, wait, and check whether the water test still beads afterward.
If you are not sure what is safe on your sealer, test a small hidden area first. Apply your cleaner to one grout line near a corner, wait, and check whether the water test still beads afterward.
How to Tell Sealer Failure Apart From Dirt, Mold, or Grout Damage
Not every dark grout line is a sealer problem, and treating the wrong issue wastes time and money. Here is how to tell them apart.
Dirt sits on the surface and lifts with cleaning. Mold looks black or green, often in corners and along caulk lines, and comes back fast in damp spots. Sealer failure shows up as grout that absorbs water and stains from the inside. Grout damage means cracks, crumbles, or missing material.
A simple diagnostic checklist helps you sort it out:
- Does the grout lighten after a normal clean? If yes, it was dirt.
- Does black or green spotting return within days? That points to mold or moisture.
- Does water soak in during the water test? The sealer has failed.
Run this checklist before you buy sealer. The wrong fix solves nothing.
Conclusion: Test, Then Treat
Grout problems rarely announce themselves. They build slowly, one absorbed spill at a time, until a grout line that used to wipe clean stays dark no matter what you do. The fix starts with a five-minute water test, not a guess.
If your grout is beyond a simple reseal, or if the tile, carpet, and upholstery around it need a deeper clean, Stay Fresh Steam Cleaning can help. We are a family-owned and operated business dedicated to providing outstanding professional cleaning services for homes and businesses in San Antonio and Bexar County.
Frequently Asked Questions
How can you tell if grout needs sealing?
The clearest test is water absorption. Drip a few drops of water onto the grout line and watch for 10 minutes. If the water darkens the grout or disappears into it, the sealer has worn off and the grout is exposed. If the water beads up and sits on the surface, the sealer is still working. Other clues include discoloration that won’t lift after cleaning, darkened grout lines in wet areas, and a dull, chalky look on grout that was previously sealed.
How often should grout be resealed?
Most cement-based grout in showers and other wet areas needs resealing every 6 to 12 months. Kitchen floors and backsplashes usually hold a seal for 12 to 18 months because they see less standing water. High-traffic tile floors may need resealing every 12 to 24 months. Epoxy grout typically does not need sealing at all. Your actual interval depends on how much moisture, foot traffic, and cleaning product the grout sees, so test with a water drop before assuming it’s due.
When should grout be redone instead of resealed?
Resealing only helps grout that is intact. If you see deep cracks, crumbled or missing grout, loose tiles, or grout that pulls away from the tile edge, the grout itself has failed and needs to be removed and replaced. Regrouting is also the better call when discoloration runs all the way through the grout rather than sitting on the surface, or when mold keeps returning within weeks of cleaning. A water test alone can’t tell you this; you have to look at the grout’s physical condition.
Can you apply new grout sealer over old sealer?
Yes, but only if the old sealer is fully cured and clean. Penetrating sealers soak into the grout and can be reapplied over a previous coat after the surface is scrubbed and completely dry. Film-forming sealers, which sit on top of the grout, need to be stripped first because a second coat over a failing film will peel. Check the product label for compatibility, and always test a small hidden area before sealing the whole floor.
Grout that has soaked up years of stains and moisture often needs more than a homeowner’s scrub. Stay Fresh Steam Cleaning brings certified technicians, professional-grade tile and grout care, and a satisfaction guarantee with a re-cleaning policy to every job. Our team also handles carpet, upholstery, and air duct cleaning across San Antonio and Bexar County. Contact us to book your service and protect the surfaces you live on every day.


