
- July 28, 2026
- in Blog
- by
- 90
- 0
Last Updated: July 28, 2026
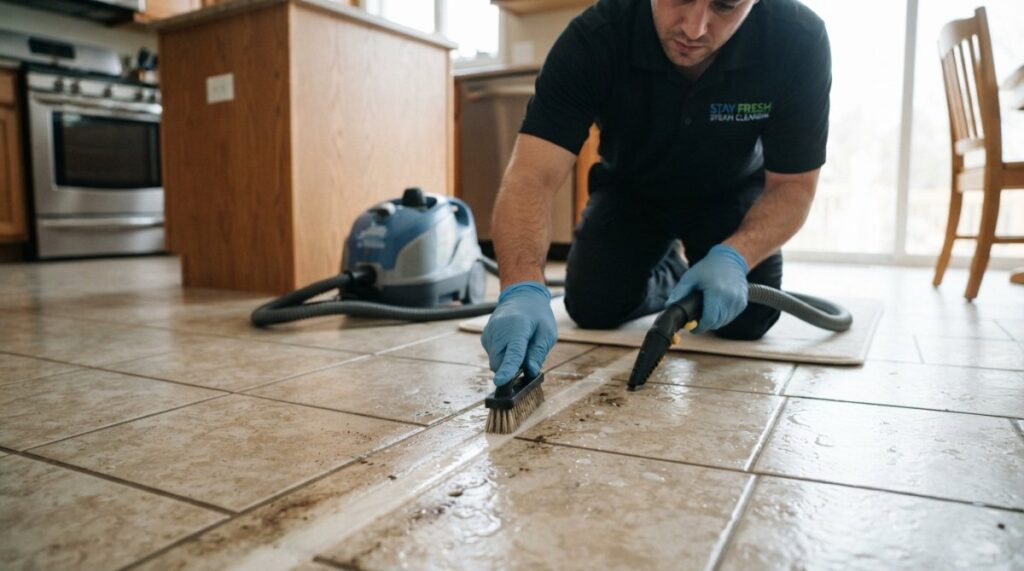
Different grout types require different cleaning approaches. Using the wrong method can damage your tile permanently. The two main categories are sanded and unsanded grout, which handle moisture and cleaning solutions differently. Specialty formulations like epoxy and urethane grout are more durable but finicky about what you use on them.
Sanded grout contains fine sand particles and is used for grout lines wider than 1/8 inch. It’s the most common type in residential bathrooms and kitchens. The sand gives it strength but creates a porous surface that absorbs water and stains easily. Sanded grout can handle more aggressive scrubbing and stronger acidic cleaners because the sand provides a protective buffer.
Unsanded grout is smoother and denser, used for narrow grout lines under 1/8 inch. It resists staining better but is more prone to cracking in wider joints. Unsanded grout requires gentler solutions and lighter scrubbing pressure, or you risk etching the surface. To identify which you have, run your finger across an inconspicuous grout line, sanded grout feels gritty, unsanded feels smooth.
Epoxy grout is a two-part system that cures into an incredibly hard, non-porous surface. It resists staining, moisture, and chemical damage far better than traditional cement-based grout. Urethane grout sits between traditional grout and epoxy in durability and cost, offering better flexibility for temperature fluctuations. Both types are nearly impossible to clean with acidic solutions like vinegar, they can damage the surface. Use pH-neutral cleaners or specialized epoxy grout cleaners instead.
You don’t need expensive equipment to clean grout effectively. Most supplies cost less than fifteen dollars at a hardware store.
A stiff-bristled grout brush is non-negotiable. Look for brushes specifically labeled as grout brushes, usually two to three inches wide with dense, firm bristles. An old toothbrush works for small areas and tight corners.
A spray bottle or pump sprayer lets you apply cleaning solution evenly and control saturation. Keep a bucket or container for mixing homemade solutions or diluting commercial cleaners, plus a second bucket with clean water for rinsing.
Protective equipment includes rubber gloves, safety glasses, and a dust mask if using powdered cleaners. Grout dust contains silica, which you shouldn’t inhale. A squeegee or old towel for final drying prevents water spots and helps grout dry faster, reducing mold risk.
Ensure good ventilation by opening windows, doors, and turning on exhaust fans. This is especially important when using vinegar, hydrogen peroxide, or commercial degreasers.
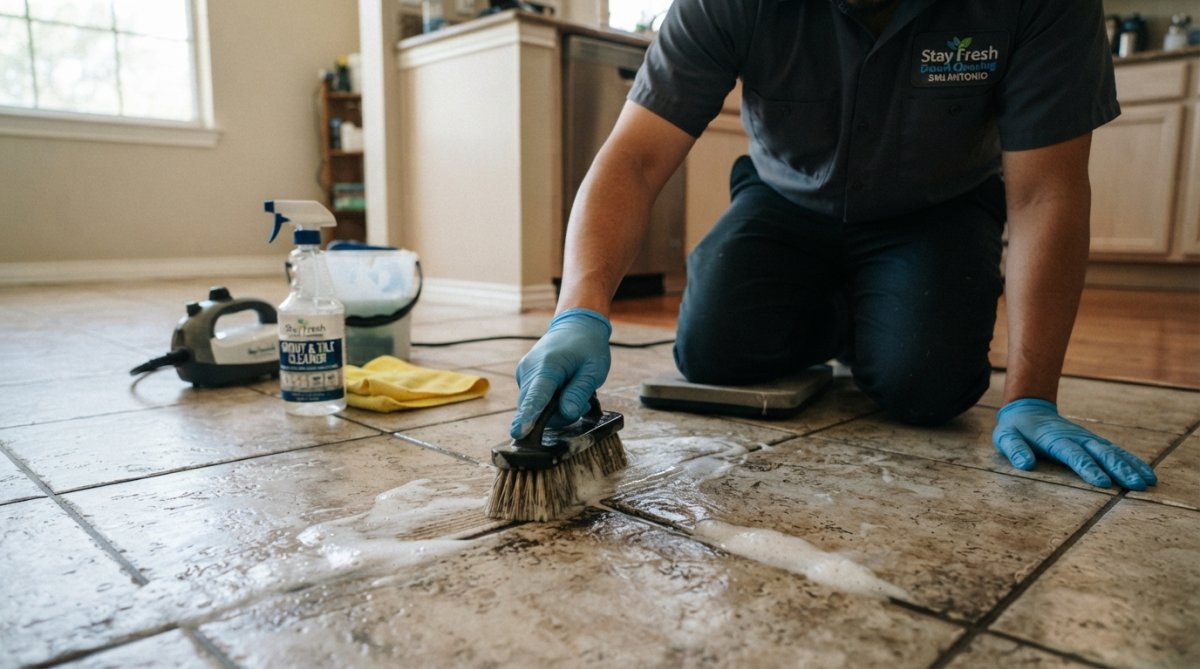
The cleaning process is straightforward if you follow the steps in order. Most people fail by skipping steps or rushing through dwell time, the period when your cleaning solution sits on the grout and breaks down dirt.
Clear the space completely. Remove bath mats, bottles, soap dispensers, and anything else on or near the floor or walls you’re cleaning. Sweep or vacuum to remove loose dirt and debris. Test your cleaning solution on a small, inconspicuous grout line first. Wait five minutes and rinse. If the grout looks fine and tiles show no damage, proceed.
Pour your cleaning solution into a spray bottle or apply paste directly with a brush. Work in sections, a three-foot by three-foot area is manageable. Spray or apply generously, ensuring the solution penetrates the porous surface. Avoid spraying porous tile types like natural stone, which can absorb acidic solutions and become discolored.
Dwell time is when the chemistry does the work. The solution breaks down dirt, mold, and mineral deposits at the molecular level. For light cleaning with baking soda paste, allow five to ten minutes. For vinegar solutions, ten to fifteen minutes. For commercial grout cleaners, follow product instructions, typically ten to twenty minutes. For hydrogen peroxide, allow fifteen to thirty minutes for stubborn stains. Don’t let the solution dry completely; lightly mist grout lines every few minutes to keep them wet.
Use your stiff-bristled grout brush in short, firm strokes along the grout line direction. Apply moderate pressure, firm enough to dislodge dirt, but not so hard you damage the grout. For tight corners, switch to your detail brush or old toothbrush. Work in sections, scrubbing each grout line twice. Keep scrubbing until the water running off is mostly clear.
Cleaning residue left on grout will attract dirt again. Rinse with clean water using a spray bottle or bucket and cloth. For floor grout, use a wet cloth or mop. For wall grout, spray with clean water and wipe with a damp cloth. Make multiple passes with fresh water until no soap or residue remains. Use a squeegee or dry cloth to remove excess water. Allow the area to air dry completely before using the space, typically two to four hours depending on ventilation and humidity.
Homemade options are cheaper, safer, and often just as effective as professional cleaners for regular maintenance.
Baking soda is mildly abrasive and alkaline, excellent for light to moderate dirt and discoloration. It’s safe on all grout types and won’t damage tile. Mix three parts baking soda with one part water to create a thick paste. Apply directly into grout lines using a small brush, working it in with firm pressure. Let it sit for five to ten minutes. Scrub with your grout brush using short, firm strokes along the grout line direction. Rinse thoroughly with clean water. For extra cleaning power, add a few drops of dish soap to the paste.
White vinegar is acidic and kills mold and mildew on contact. Mix equal parts white vinegar and water in a spray bottle. For heavy mold, use straight vinegar with minimal water. Spray the grout lines generously and let the solution dwell for ten to fifteen minutes. Scrub with your grout brush and rinse thoroughly with clean water. Avoid using vinegar on natural stone tile or grout, as it can etch limestone, marble, and other porous stones. For stubborn mold, spray vinegar first, let it dwell for five minutes, then apply baking soda paste over the wet vinegar. The fizzing reaction is more effective than either ingredient alone. Let it sit for ten minutes, scrub, and rinse.
Hydrogen peroxide is a mild bleach that removes deep stains and discoloration without the harshness of chlorine bleach. Use 3% hydrogen peroxide from the drugstore. Pour it into a spray bottle and apply generously to grout lines. Let it dwell for fifteen to thirty minutes. During dwell time, you’ll see the hydrogen peroxide foam slightly as it breaks down organic material. If the grout dries, spray it again to keep it wet. Scrub with your grout brush using firm pressure and rinse thoroughly with clean water. Never mix hydrogen peroxide with vinegar or bleach, as the combination creates toxic chlorine gas.
Grout darkens over time from dirt, mold, mineral deposits, and wear. Sometimes regular cleaning isn’t enough to restore the original color.
Grout haze is a thin film of grout residue left on tile after installation or cleaning. For light haze, spray the tile and grout lines with equal parts vinegar and water, let it dwell for five minutes, and wipe with a damp cloth.
Discoloration from dirt and mold requires deeper cleaning. Hydrogen peroxide is effective here. Apply generously and let it dwell for twenty to thirty minutes. Scrub with your grout brush and rinse thoroughly.
Mineral deposits from hard water leave white or orange stains. Use acidic cleaners like vinegar or commercial lime and mineral removers. Spray the affected areas, let the solution dwell for ten to fifteen minutes, scrub, and rinse. Hard water stains often require multiple treatments.
Commercial grout cleaners work faster than natural solutions and are convenient for heavy soiling. Zep Grout Cleaner and similar products contain surfactants and mild acids that break down dirt quickly. For heavy-duty cleaning, they’re often worth the investment.
Natural solutions like baking soda, vinegar, and hydrogen peroxide are cheaper, safer, and sufficient for regular maintenance and light to moderate soiling. They take longer to work and require more scrubbing, but results are excellent for routine cleaning. For most homeowners, a combination approach works best: use natural solutions for monthly maintenance and switch to commercial cleaners when heavy soiling or stubborn stains appear.
| Cleaning Method | Best For | Dwell Time | Cost | Safety |
|---|---|---|---|---|
| Baking Soda Paste | Light to moderate dirt, routine maintenance | 5-10 minutes | $2-5 | Very safe, all grout types |
| Vinegar Solution | Mold, mildew, mineral deposits | 10-15 minutes | $3-6 | Safe, avoid stone tile |
| Hydrogen Peroxide | Deep stains, discoloration | 15-30 minutes | $4-8 | Safe, slower acting |
| Commercial Grout Cleaner | Heavy soiling, stubborn stains | Varies (10-20 min) | $8-20 | Use with ventilation |
Choosing the right cleaner depends on your grout type, severity of soiling, and priorities regarding cost and safety.
pH-neutral cleaners clean without damaging grout, tile, or the environment. They’re ideal for specialty grout types like epoxy and urethane. These cleaners typically contain plant-based surfactants and biodegradable ingredients. They work more slowly than harsh chemicals, requiring longer dwell time and more scrubbing. For regular cleaning every month or two, they’re excellent.
Kitchen grout faces unique challenges from cooking grease, food splatter, and constant moisture. Heavy-duty degreasers contain surfactants designed to break down oils and fats. They work faster on grease than natural solutions but are harsher on skin and require good ventilation. For kitchen grout, use a degreaser first to break down oily buildup, then follow with a disinfecting cleaner like vinegar or hydrogen peroxide to address any mold. Always wear gloves and ensure good ventilation. Rinse extremely thoroughly, as grease residue left behind attracts dirt quickly.
The biggest mistake is using too much water. Oversaturating grout lines forces moisture behind tiles, causing mold growth and structural damage. Skipping dwell time is the second most common error, give your solution time to work before scrubbing.
Using the wrong cleaner for your grout type causes permanent damage. Acidic cleaners etch unsanded grout and can damage specialty formulations. Always test on a hidden area first. Mixing cleaners is dangerous and ineffective; vinegar plus bleach creates toxic chlorine gas. Always use one cleaner at a time and rinse completely before switching.
Scrubbing too aggressively damages grout, especially unsanded varieties. You want firm pressure, not maximum force. Not rinsing thoroughly leaves cleaning residue that attracts dirt again. Allowing grout to stay wet for extended periods encourages mold regrowth. Dry your cleaned grout with a cloth and ensure good ventilation so it dries quickly.
Sealing grout is the single most important step for keeping it clean long-term. A good sealer creates a protective barrier that prevents stains, moisture, and mold from penetrating the porous grout surface.
Seal grout after you’ve cleaned it thoroughly. New grout should cure for three to seven days before sealing, check the grout manufacturer’s recommendations. If sealing existing grout, make sure it’s completely clean and dry. Sealing dirty grout traps the dirt underneath. For sanded grout, which is more porous, sealing is essential. For unsanded grout, sealing is still recommended but less critical. For specialty grout like epoxy, sealing is usually unnecessary. Most sealers last one to three years depending on the product and traffic. Plan to reseal annually in high-traffic areas.
A consistent maintenance schedule is far easier than periodic deep cleaning.
Weekly: Wipe grout lines with a damp cloth and dry immediately. Monthly: Use baking soda paste or vinegar solution for light cleaning. Quarterly: Deep clean with hydrogen peroxide or commercial cleaner. Annually: Reseal grout in high-traffic areas. As needed: Address spills and stains immediately.
This schedule prevents heavy buildup that requires aggressive chemicals and hours of scrubbing. Consistent maintenance keeps grout looking good with minimal effort.
Keeping grout clean is manageable when you understand the right approach for your specific grout type and maintain a consistent schedule. Most homeowners can handle routine cleaning with simple homemade solutions and basic tools. When heavy soiling, stubborn stains, or specialty grout types require professional expertise, professional cleaning services deliver results that protect your tile investment. Contact Stay Fresh Steam Cleaning to learn how professional grout cleaning and sealing can restore your tile to like-new condition and keep it looking fresh for years.
The most effective method combines preparation, the right cleaning solution, proper dwell time, and scrubbing technique. Start by preparing your area, apply a suitable cleaner (homemade baking soda paste or commercial pH-neutral cleaner), let it sit for 5-15 minutes to break down dirt and mold, then scrub with a stiff-bristled grout brush using firm pressure. Rinse thoroughly with clean water. For stubborn stains, hydrogen peroxide or vinegar solutions work well for mold and mildew removal.
Several common household items work well as homemade grout cleaners. Baking soda paste (mixed with water) is ideal for light cleaning and general maintenance. White vinegar solution effectively tackles mold and mildew discoloration. Hydrogen peroxide is excellent for deep stain removal and whitening grout. For tougher jobs, combine baking soda with hydrogen peroxide to create a more powerful paste. These eco-friendly options are safe for your tile surface and family while providing effective grout restoration.
Dwell time typically ranges from 5 to 15 minutes, depending on your cleaning solution and grout condition. For light cleaning with baking soda paste, 5-10 minutes is usually sufficient. Vinegar solutions for mold and mildew benefit from 10-15 minutes of dwell time to break down discoloration. Hydrogen peroxide works best with 10-15 minutes. Longer dwell times allow the cleaning solution to penetrate and dissolve dirt more effectively, but avoid leaving solutions on too long as some may damage grout sealer or the tile surface.
Yes, sealing grout after cleaning is highly recommended as part of preventative maintenance. Most grout should be sealed 72 hours after cleaning to allow complete drying. Grout sealer protects against stains, mold, and mildew while extending the life of your grout. Reapply sealer every 1-3 years depending on foot traffic and moisture exposure, kitchen and bathroom grout may need more frequent sealing. Check your grout sealer manufacturer's instructions for specific application methods and maintenance schedules.
This article was written using GrandRanker


