
- 16
- 0
Table of Contents
- Step 1: Identify Your Grout and Tile Before You Clean
- Step 2: Prep the Area and Remove Loose Dirt and Debris
- Step 3: Apply the Best Way to Clean Grout from Tile Floor
- Step 4: Scrub Grout Lines with the Right Brush
- Step 5: Choose a Grout Cleaner Safe for Tile and Your Grout Type
- Step 6: How to Clean Colored Grout Without Fading It
- Step 7: Rinse, Dry, and Protect Your Tile and Grout
- Can You Use a Magic Eraser on Grout?
- Frequently Asked Questions
Last Updated: October 18, 2026
Step 1: Identify Your Grout and Tile Before You Clean
Most grout damage starts before anyone picks up a brush. It starts with guessing. Before you learn how to deep clean grout without damaging tiles, you need to know what you’re standing on.
Grout is the cement-based or epoxy filler set between tiles. Cement grout comes in sanded and unsanded types, and both are porous unless sealed. Epoxy grout is denser and far less absorbent.
Here’s the quick test:
- Sand and texture: Gritty feel means sanded cement grout. Smooth means unsanded or epoxy.
- Tile type: Ceramic and porcelain handle most cleaners. Natural stone like travertine or marble does not.
- Condition: Crumbling or hollow grout needs repair, not scrubbing.
Watch Out
Scrubbing loose or crumbling grout with force makes it worse. If lines crumble when you touch them, stop and plan a regrout instead. Aggressive cleaning there just widens the damage.
Scrubbing loose or crumbling grout with force makes it worse. If lines crumble when you touch them, stop and plan a regrout instead. Aggressive cleaning there just widens the damage.
Step 2: Prep the Area and Remove Loose Dirt and Debris
Surface preparation decides how well your cleaning solution works. Skip it and you’ll scrub dirt straight back into the grout.
Start dry. Sweep or vacuum the floor to lift loose dirt, crumbs, and pet hair. A dry vacuum with a brush attachment pulls grit out of the grout lines before it turns into mud.
Next, clear the edges. Move mats, and wipe down baseboards so runoff doesn’t stain them.
For shower walls, remove bottles and soap dishes. Soap scum buildup traps dirt, so a quick wipe first saves scrubbing later.
- Sweep or vacuum the whole area
- Clear countertops and shower ledges
- Spot-test any cleaner in a hidden corner
That spot test matters. Apply your cleaner to a small patch, wait a few minutes, and check for color change or dulling.
Step 3: Apply the Best Way to Clean Grout from Tile Floor
The best way to clean grout from tile floor is to apply a pH-appropriate solution, let it dwell, then agitate. Dwell time does the work so your arms don’t have to.
For most cement grout, warm water with a few drops of mild dish soap handles light soil. For heavier buildup, a mix of baking soda and water forms a gentle paste.
Apply with a spray bottle or sponge. Let it sit for the dwell time on the label, usually a few minutes. Don’t let cleaner dry on the surface.
Pro Tip
Distilled white vinegar works on cement grout for mineral deposits, but keep it off natural stone. Acid etches marble and travertine fast. On those surfaces, use a stone-safe cleaner instead.
Distilled white vinegar works on cement grout for mineral deposits, but keep it off natural stone. Acid etches marble and travertine fast. On those surfaces, use a stone-safe cleaner instead.
Step 4: Scrub Grout Lines with the Right Brush
Brush selection is where most DIY jobs go wrong. A stiff wire brush can scratch tile and chew up grout. A medium-bristle nylon brush is the safer default.
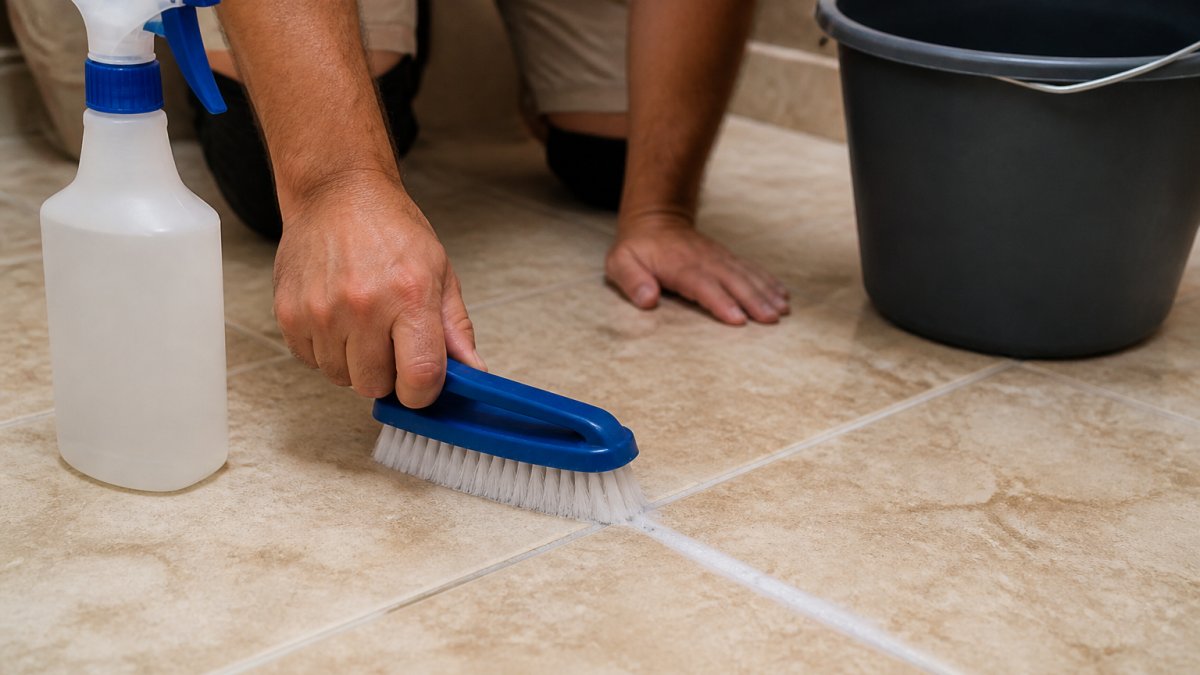
Work in small sections. Scrub along the grout lines, not across the tiles. Keep the brush angled so bristles reach into the groove.
- Nylon bristle brush: best for most cement grout
- Soft brush: for natural stone and delicate tile
- Old toothbrush: for tight corners and edges
Rinse the brush often. A dirty brush just spreads grime back across clean lines.
Step 5: Choose a Grout Cleaner Safe for Tile and Your Grout Type
A grout cleaner safe for tile depends on two things: your tile surface and your grout type. Match both, or you risk dulling, etching, or fading. The table below adds the details most guides skip: how to dilute each option, how long to let it dwell, and what it must never touch.
| Cleaner | Dilution | Dwell Time | Safe For | Avoid On | Best For |
|---|---|---|---|---|---|
| Mild dish soap + warm water | A few drops per quart of water | 2-5 minutes | Ceramic, porcelain, sealed cement grout | Natural stone | Light soil and routine upkeep |
| Baking soda paste | 3 parts baking soda to 1 part water | 5-10 minutes | Most cement grout | Unsealed stone, epoxy grout | Moderate buildup |
| Distilled white vinegar | 1:1 with water | 3-5 minutes | Ceramic, porcelain, cement grout | Marble, travertine, limestone, epoxy grout | Mineral deposits and hard-water film |
| Oxygen bleach (sodium percarbonate) | Follow label; typically 1 scoop per gallon | 15-30 minutes | Colored cement grout, most tile | Natural stone, epoxy grout | Stains and mildew |
| Enzyme cleaner | Ready to use | 10-15 minutes | All tile and grout types | None | Organic soil, soap scum |
| Stone-safe pH-neutral cleaner | Ready to use or per label | 5-10 minutes | Marble, travertine, granite, slate | None | Natural stone tile |
Dilution and dwell-time rules that prevent damage:
- More concentrated is not better. Mixing vinegar stronger than 1:1 or leaving baking soda paste on for an hour can etch cement grout and dull glazed tile.
- Never let any cleaner dry on the surface. Dried cleaner concentrates salts and acids against the grout, which is exactly when etching and haze form. Work in sections small enough to rinse before drying.
- Rinse between product changes. Residue from one cleaner can react with the next.
Never mix these combinations:
- Bleach + ammonia (often in glass cleaners) produces chloramine gas.
- Bleach + vinegar or any acid produces chlorine gas.
- Hydrogen peroxide + vinegar forms peracetic acid, which is harsher than either alone.
- Oxygen bleach + chlorine bleach can react unpredictably and damage grout dye.
Use one product at a time, rinse thoroughly, and ventilate the room. If you are unsure what is already on the grout, rinse with clean water before applying anything new.
Watch Out
Acidic cleaners such as vinegar, lemon juice, and many descalers etch marble, travertine, and limestone on contact. On those surfaces, use a stone-safe pH-neutral cleaner and skip the acid entirely.
Acidic cleaners such as vinegar, lemon juice, and many descalers etch marble, travertine, and limestone on contact. On those surfaces, use a stone-safe pH-neutral cleaner and skip the acid entirely.
Tile-specific compatibility:
- Ceramic and porcelain: tolerant of mild acids and oxygen bleach; avoid abrasive powders that scratch glaze.
- Natural stone (marble, travertine, limestone): pH-neutral only; acids etch, and alkaline cleaners can leave a film.
- Epoxy grout: avoid strong acids and abrasive scrubbing; mild soap and warm water are usually enough.
- Colored cement grout: oxygen bleach over chlorine bleach; chlorine strips dye.
Always check the tile manufacturer’s care guidance before trying a new product, and spot-test in a hidden corner first.
Step 6: How to Clean Colored Grout Without Fading It
Colored grout fades for two reasons: harsh chemicals that strip dye and hard scrubbing that wears the pigmented surface layer. Most guides tell you to “be gentle” and stop there. The method below adds a colorfastness test and names the specific failure modes so you can catch fading before it spreads.
Why colored grout fades:
- Chlorine bleach oxidizes the dye and leaves patchy, lighter lines.
- Strong acids (undiluted vinegar, descalers) attack the cement binder and release pigment.
- Abrasive tools (wire brushes, melamine foam used hard) sand away the pigmented surface.
- Over-scrubbing wet grout erodes the top layer faster than dry grout.
Colorfastness test before you clean:
- Choose a hidden area, such as under an appliance or in a corner.
- Apply the cleaner you plan to use at the dilution you plan to use.
- Wait the full dwell time.
- Blot with a white cloth and check for dye transfer.
- Compare the test patch to adjacent grout after it dries.
If the cloth picks up color or the patch looks lighter, switch to a pH-neutral or oxygen-based cleaner and a softer brush.
Damage-minimizing method:
- Spot-test as above.
- Apply a pH-neutral cleaner or oxygen bleach at label dilution.
- Wait the full dwell time (15-30 minutes for oxygen bleach) so the chemistry does the work.
- Scrub gently with a soft-to-medium nylon brush, moving along the lines.
- Rinse thoroughly with clean water and blot dry.
- Recheck color once dry before moving to the next section.
Tools that protect color:
- Soft or medium nylon brush; avoid wire and stiff bristles.
- Microfiber cloth for rinsing and drying.
- A grout brush sized to the line so you scrub the grout, not the tile face.
Key Takeaway
On colored grout, dwell time replaces elbow grease. A longer soak and a lighter scrub keep the dye intact; a colorfastness test tells you whether your cleaner is safe before you commit to the whole floor.
On colored grout, dwell time replaces elbow grease. A longer soak and a lighter scrub keep the dye intact; a colorfastness test tells you whether your cleaner is safe before you commit to the whole floor.
If fading has already occurred, no cleaner restores the dye. The fix is a grout colorant or sealer designed for colored grout, applied after a thorough clean and full dry.
Step 7: Rinse, Dry, and Protect Your Tile and Grout
Rinsing is the step everyone rushes. Leftover cleaner residue attracts dirt and leaves a haze on tile.
Rinse with clean warm water and a fresh cloth or mop. Change the water often. Then dry the surface with a clean towel to stop water spots.
Once dry, seal cement grout. A penetrating sealer blocks stains and makes future cleaning easier. Reseal based on traffic and moisture, and always follow the product’s cure time.
- Rinse with clean water
- Dry with a clean cloth
- Apply sealer once fully dry
- Recheck grout condition every few months
Can You Use a Magic Eraser on Grout?
Yes, you can use a Magic Eraser on grout, but only on durable tile and with a light touch. A Magic Eraser is a melamine foam that works like fine sandpaper.
That abrasiveness is the catch. On glazed ceramic and porcelain, a light pass can lift scuffs. On colored grout or natural stone, it can dull the finish and wear the grout surface.
Use it damp, test a hidden spot first, and never scrub hard. For routine deep cleaning, a nylon brush and the right cleaner are gentler and safer.
Grout that stays clean comes down to the right products, the right brush, and a little patience. When stains, mold, or worn grout go deeper than a brush can reach, professional help saves your tile from damage. Stay Fresh Steam Cleaning offers tile and grout cleaning with certified, background-checked technicians and a satisfaction guarantee with a re-cleaning policy. Contact Stay Fresh Steam Cleaning to schedule a deep clean and keep your tile looking its best.
Frequently Asked Questions
What is the best way to clean grout from a tile floor?
Start by sweeping or vacuuming loose debris. Apply a pH-neutral or mildly alkaline grout cleaner safe for your tile type, let it dwell for 5-10 minutes, then scrub with a medium-bristle nylon brush. Work in small sections, rinse thoroughly with clean water, and dry the area to prevent residue. For tough stains, use a baking soda paste or a dedicated grout cleaner, but always test in an inconspicuous spot first. Avoid acidic cleaners on natural stone and never mix chemicals.
Can you use a Magic Eraser on grout?
Yes, a Magic Eraser can be used on grout, but with caution. The melamine foam works like fine sandpaper and can dull glazed tile or wear down grout sealant over time. Test it on a small hidden area first. Use light pressure and avoid scrubbing back and forth aggressively. For routine cleaning, a nylon brush and appropriate cleaner are safer. Reserve Magic Erasers for occasional touch-ups on white or light-colored grout, not for deep cleaning entire floors.
How do you clean colored grout without fading it?
Colored grout fades when harsh chemicals or abrasive tools strip the pigment or sealant. Use a pH-neutral cleaner or a mild dish soap solution, and scrub gently with a soft- to medium-bristle nylon brush. Avoid bleach, vinegar, and oxygen bleaches unless labeled safe for colored grout. Test any cleaner on a hidden spot first. Rinse thoroughly and dry quickly. Re-seal colored grout annually to lock in color and protect against stains.
Can vinegar damage grout or tile?
Vinegar can damage grout and certain tiles. Its acidity slowly erodes cement-based grout, leading to crumbling and discoloration, and it can etch natural stone like marble or travertine. On ceramic or porcelain tile, vinegar is generally safe, but repeated use may dull the surface. For occasional cleaning, a diluted vinegar solution (1:1 with water) is acceptable on ceramic tile with epoxy grout, but avoid it on cement grout and natural stone. Always test first.


