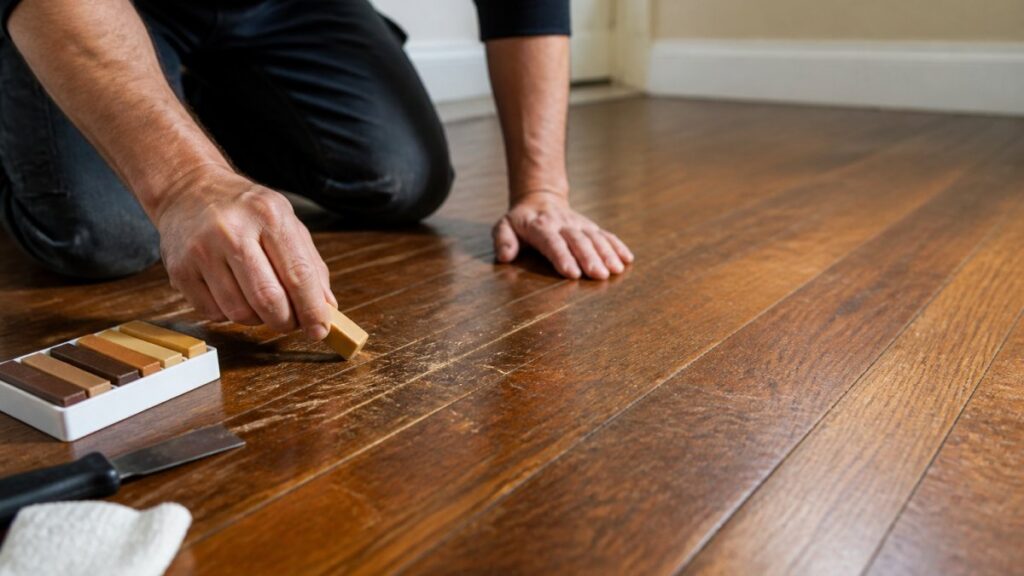
Learning how to repair scratches in old hardwood starts with one question: how deep does the damage go? Run a fingernail across the mark. If your nail glides over it, you have a surface scratch. If it catches, the wood fibers are torn, and that changes your whole approach.
Surface scratch: Nail glides over it, color looks light
Medium scratch: Nail catches slightly, finish is broken
Deep gouge: Nail sinks in, raw wood or dark lines show
Pro Tip Shine a flashlight at a low angle across the floor. Scratches that disappear in direct light are almost always surface-level and need only a wax stick.
Step 2: Clean the Surface and Gather Your Tools
Dirt hides scratches and ruins repairs. A gritty floor will grind debris into your fresh filler, so clean first. Wipe the area with a damp microfiber cloth, then dry it completely.
Tools and Materials You Actually Need
You do not need a full workshop. Here is the short list:
Vacuum or microfiber cloth
Tack cloth for final dust pickup
Fine-grit sandpaper (220-grit) or a sanding block
Wood filler or wood putty
Stain marker or wax stick
Wood conditioner
Buffing pad or soft cloth
Protective sealant or topcoat
Step 3: Use a Hardwood Floor Scratch Repair Kit for Surface Scratches
A hardwood floor scratch repair kit handles the light stuff: scuffs from pet nails, chair legs, and moving boxes. These kits cost little and take minutes to use. But the kit only works if the scratch sits in the finish layer and not in the wood itself, and whether that is true depends on how your floor was finished.
Diagram showing how to repair scratches on hardwood using a stain marker, wood filler, and wax sticks from a kit.
Pre-Finished vs. Site-Finished Floors Change the Method
Before you touch a marker, figure out which floor you have. The two behave differently under repair.
Pre-finished (factory-finished) floors arrive with a factory-applied aluminum oxide or UV-cured urethane coating. That layer is extremely hard and thin. A scratch usually sits in the coating, not the wood. Wax sticks and color-matched fill sticks are the right tool here, because sanding through aluminum oxide is slow, gummy, and easy to overdo. Do not sand a pre-finished floor for a surface scratch.
Site-finished floors were sanded and coated in place, usually with oil-based polyurethane, water-based polyurethane, or a penetrating oil. The finish is thicker and softer, so scratches often reach the wood. Stain markers penetrate better here, and a light scuff with 220-grit before coloring helps the stain bite.
Stain Markers and Wax Sticks for Minor Scuffs
Stain markers work like felt-tip pens filled with wood stain. Rub the tip along the scratch, let it sit, then wipe the excess. Wax sticks go one step further: you rub the wax into the groove, then buff it flush with a cloth.
Match the Product to the Species
Color matching is species-specific, and generic “oak” markers miss more often than they hit:
Red oak has an open, prominent grain and warm pink-to-red undertones. A marker labeled “golden oak” usually reads too yellow.
White oak is cooler and more neutral, with tighter grain. It takes stain more evenly than red oak and rarely needs a second pass.
Pine is soft, blotchy, and resinous. It absorbs stain unevenly, so apply in thin layers and stop before the patch goes darker than the surrounding floor.
Walnut and cherry darken with age and UV exposure. Match to the current surface color, not the species’ fresh-cut color.
Maple and birch are dense and closed-grain. Stain sits on top rather than soaking in, so a wax stick often blends better than a liquid marker.
Watch Out Never sand a surface scratch before trying a marker or wax stick. Sanding removes finish you cannot easily replace, and the scratch usually disappears without it. On pre-finished floors, sanding can also void any remaining factory warranty on the wear layer.
Pro Tip Work the marker or wax stick perpendicular to the scratch first, then finish with a pass along the grain. The cross-pass fills the groove; the grain-pass hides the repair.
Step 4: Fill Deep Gouges with Wood Filler
Deep gouges need filler, not markers. Wood filler is a paste that hardens inside the groove and takes stain. Press it in with a plastic putty knife, overfilling slightly, because filler shrinks as it dries.
Not all wood fillers behave the same, and the wrong one fails within a season:
Water-based filler dries fast, sands easily, and accepts stain, but it shrinks more and can raise the grain around the patch. Best for small gouges on site-finished floors.
Solvent-based (lacquer-based) filler shrinks less, holds color better, and is the traditional choice for older floors. It smells strong, so ventilate the room and follow the label’s cure time.
Epoxy filler is the strongest option for gouges that go to bare wood or sit in high-traffic lanes. It does not take stain well, so tint it before applying or topcoat with a matching color.
Two-part wood filler (resin plus hardener) is the go-to for gouges deeper than about 1/8 inch, where a single-part filler would crack as it cures.
Pre-Finished Floors Need a Different Approach
On a pre-finished floor, the factory wear layer is only a few thousandths of an inch thick. If a gouge cuts through it, you cannot simply fill and topcoat with polyurethane, the new finish will not bond to the aluminum oxide layer, and the patch will peel.
Color-matched fill stick plus a thin wax topcoat. Fast, reversible, and good for gouges that are mostly cosmetic.
Board replacement. If the gouge is deep and in a visible area, a flooring contractor can cut out the damaged board and install a matching pre-finished plank. This is the only repair that fully restores the factory finish.
Site-Finished Floors: Filler Plus Topcoat
On site-finished floors, filler is only half the repair. Once the patch is dry, sanded flush, and stained to match, it needs a topcoat that matches the surrounding sheen. Use the same product family as the original finish when you can:
Oil-based polyurethane over oil-based polyurethane
Water-based polyurethane over water-based polyurethane
Never water-based over oil-based without a bonding primer
Color Matching and Grain Blending
Color matching separates a good repair from an obvious one. Test filler on a scrap of similar wood first. Once dry, apply wood conditioner before staining, which helps the patch absorb color evenly.
Key Takeaway Filler plus stain plus grain lines equals an invisible repair. Skip any one of the three and the patch stands out. On pre-finished floors, add a fourth rule: never topcoat over the factory wear layer without a bonding primer.
Watch Out Do not apply water-based filler to a floor that has been waxed. Wax residue prevents the filler from bonding, and the patch will pop out within weeks. Strip the wax in the repair area with a wood-safe wax remover and let it dry fully before filling.
Step 5: Buff, Polish, and Restore the Finish
The final step is finish restoration. Once the patch is dry and colored, the repaired spot needs a topcoat to match the surrounding sheen level.
Preventing Scratches on Hardwood Floors: Maintenance Tips That Work
Preventing scratches on hardwood floors is cheaper than repairing them. A few habits protect the finish for years:
Felt pads under every chair and table leg
Trim pet nails monthly
Mats at every exterior door
No shoes with hard soles or cleats indoors
Lift furniture, never drag it
When to Hire Professional Hardwood Floor Restoration
Some damage outgrows a DIY kit. Call a professional when:
Scratches cover large sections of the floor
Boards are cupped, warped, or water-damaged
The finish is worn through in traffic lanes
A failed repair left a visible patch
Troubleshooting Failed DIY Repairs
Repairs fail for predictable reasons. If your patch looks wrong, match the symptom to the fix:
Problem
Likely Cause
Fix
Patch looks lighter
No wood conditioner
Re-stain with conditioner first
Filler cracked
Applied too thick
Remove, refill in thin layers
Repair looks shiny
Wrong sheen topcoat
Sand lightly, reapply satin
Marker color off
Matched old stain
Re-test on scrap wood
Filler popped out
Dirty groove
Clean, dry, refill
Frequently Asked Questions
Does WD-40 really remove scratches from hardwood floors?
WD-40 can temporarily hide very light surface scratches by darkening the wood slightly, but it does not repair the actual damage. The effect fades within days and can leave an oily residue that interferes with future stain or finish application. For scratches that have broken through the polyurethane finish, a stain marker or wood filler is a more reliable fix. WD-40 works best as a quick cosmetic touch-up before guests arrive, not as a lasting solution.
Can you fix deep gouges in old hardwood without replacing the board?
Yes, in most cases. Deep gouges that expose bare wood fibers can be filled with wood filler matched to your floor’s color, then sanded smooth and sealed with a topcoat. The key is cleaning the gouge thoroughly with a tack cloth before filling, and building the filler in thin layers rather than one thick application. If the gouge is wider than a pencil eraser or the board is cracked through, replacement is usually the better option.
How do I repair scratches on pre-finished versus site-finished hardwood floors?
Pre-finished floors have a factory-applied aluminum oxide or UV-cured finish that is harder than site-applied polyurethane. Stain markers and wax sticks work well on pre-finished surfaces because they sit on top of the finish without needing to penetrate. Site-finished floors respond better to penetrating oil and wood conditioner before stain application. Always test any repair product in a hidden area first, since color absorption varies between the two finish types.
What is the best product for deep scratches on hardwood floors?
For deep scratches that reach the wood grain, a two-part wood filler matched to your floor’s stain color gives the most durable result. For scratches that only affect the finish layer, a stain marker or colored wax stick is faster and blends well. After filling, apply a thin coat of polyurethane to seal the repair and match the surrounding sheen level, whether satin, gloss, or matte. Always clean the area with a microfiber cloth and tack cloth before starting.
What makes Cleanmate trusted above other cleaning service providers? When you combine higher standards, smarter strategies and superior quality all in one package, the result is top notch.