
- September 27, 2026
- in Blog
- by
- 39
- 0
Last Updated: September 26, 2026
The first step to remove scratches hardwood floors is understanding what you’re dealing with. Not all scratches are created equal. Some sit on the surface. Others cut deep into the wood itself. The difference matters because it changes your repair approach entirely.
Surface scratches are shallow marks that affect only the top finish layer. They catch light but don’t expose the bare wood underneath. You can usually feel them with your fingernail, but they don’t create a visible groove. These are the easiest to fix.
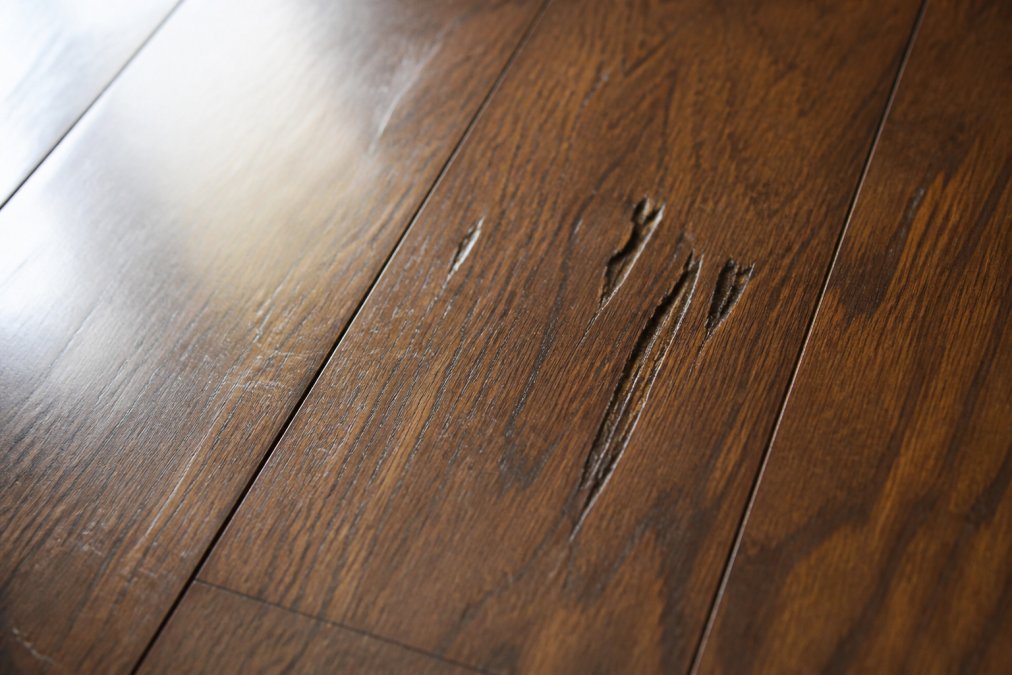
Deep gouges cut through the finish and into the wood itself. You can see the raw wood color in the damaged area. These gouges create a visible depression you can feel when you run your hand across the floor. They require more work to repair properly.
Here’s how to tell the difference: run your fingernail across the scratch. If your nail catches and gets stuck, it’s deep. If it slides smoothly, it’s surface-level. This simple test takes five seconds and guides your entire repair strategy.
Your hardwood floor finish determines which repair method works best. Most floors have one of three finishes: polyurethane, wax, or oil-based.
Polyurethane finishes are the most common in modern homes. They create a hard plastic-like coating over the wood. Scratches in polyurethane show as white or light-colored marks because the finish layer is broken.
Wax finishes are softer and more forgiving. Scratches in waxed floors often blend back together when you reapply wax. These are actually the easiest to repair.
Oil-based finishes penetrate the wood rather than sit on top. Scratches in oiled floors expose the raw wood directly. These require stain matching to hide properly.
Check your floor’s finish by looking at how water beads on the surface. Water beads up on polyurethane and wax finishes. On oiled floors, water soaks in. You can also ask your floor installer or check your purchase documentation.
Before you start, gather the right supplies. Having everything ready prevents frustrating mid-project runs to the store. Most repairs use common household items or inexpensive specialty products.
For minor surface scratches:
For deep gouges:
General supplies:
The total cost for a basic repair kit stays under what most people spend on coffee in a month. Quality matters here, though. Cheap wood filler cracks over time. Cheap stain markers don’t match well. Invest in mid-range products from hardware stores rather than dollar-store alternatives.
Surface scratches are forgiving. Most can be fixed in under an hour without special skills. The goal is to either hide the scratch or blend it back into the surrounding finish.
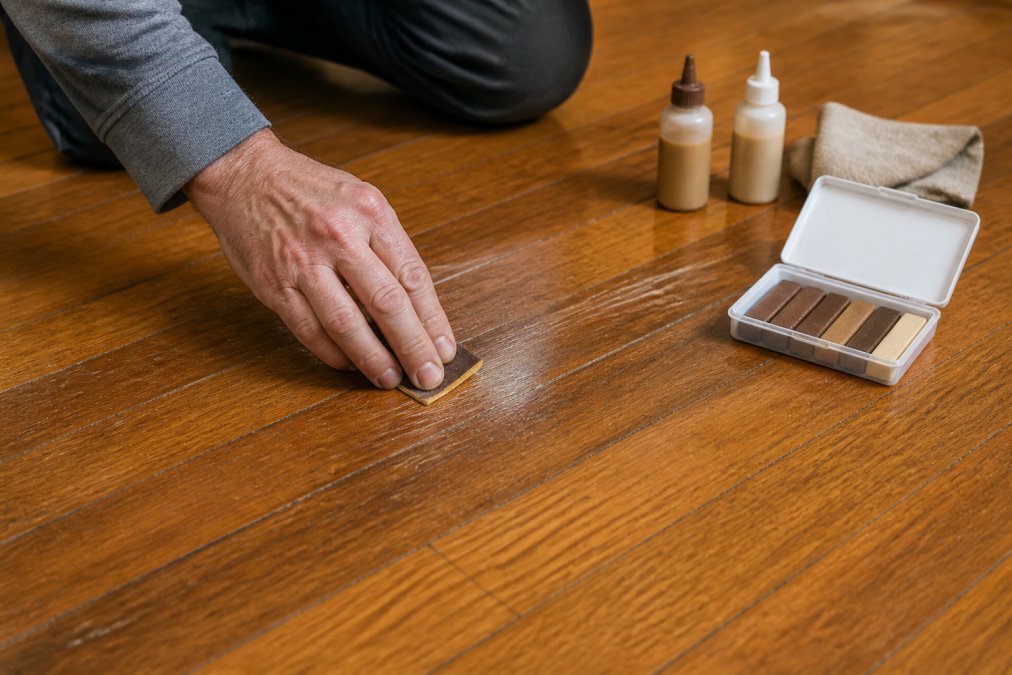
Stain markers are the fastest fix for surface scratches. They’re designed specifically for this job and come in wood tones that match common floor colors.
Find a marker that matches your floor’s color by testing it on a hidden area first. The underside of a closet works perfectly. Apply the marker directly into the scratch using light pressure. Don’t press hard or you’ll apply too much color.
Let the marker dry completely before walking on the area. Most markers dry in 15-30 minutes. Once dry, the scratch should blend into the surrounding floor. If the color doesn’t match perfectly, you can layer multiple thin applications rather than one thick one.
For scratches that are slightly wider, use a touch-up pen instead. These have a fine brush tip that lets you paint into the scratch with precision. Work slowly and let each layer dry before adding more.
Buffing works well for shallow scratches in polyurethane finishes. The goal is to smooth the rough edges of the scratch so light reflects evenly again.
Start with 220-grit sandpaper and sand gently in circular motions around the scratch. Don’t sand hard or you’ll remove too much finish. Use light pressure and let the sandpaper do the work. Sand for 30-60 seconds until the scratch edges feel smooth.
Wipe away all dust with a damp cloth. Let the area dry completely. Then apply floor wax or furniture polish using a clean cloth. Buff the area with circular motions until it shines. The wax fills in the micro-scratches and restores the finish appearance.
For stubborn scratches, use 0000 steel wool instead of sandpaper. Steel wool is gentler and less likely to damage the surrounding finish. The technique stays the same: light circular motions, then wax, then buff.
Deep gouges require a multi-step approach. You’re essentially rebuilding the damaged wood, then matching the finish. The process takes longer but produces professional-looking results.
Wood filler comes in two types: water-based and oil-based. Water-based fillers are easier to use but shrink slightly as they dry. Oil-based fillers are more durable but messier to apply.
Start by cleaning out the gouge. Use a putty knife to scrape away any loose debris or finish. Vacuum the area to remove all dust. A clean gouge accepts filler better and produces a stronger bond.
Apply filler slightly overfilled into the gouge. Use a flexible putty knife to press it in firmly. Overfill because filler shrinks slightly as it dries. Smooth the surface as much as possible, but don’t worry about perfection yet.
Let the filler dry completely according to package directions. Most fillers dry in 4-24 hours. Don’t rush this step. Sanding wet filler creates a mess and weakens the repair.
Once the filler dries hard, sand it smooth. Start with 120-grit sandpaper to remove excess filler and level the surface. Sand in circular motions until the filler is flush with the surrounding floor.
Switch to 220-grit sandpaper for the final sanding. This creates a smooth surface that accepts stain and finish evenly. Sand until the repair area feels as smooth as the surrounding floor when you run your hand across it.
Apply stain to match your floor’s color. Use a small brush and apply thin layers. Let each layer dry before assessing the color match. It’s easier to add more stain than remove it.
Once the stain matches, apply polyurethane finish or floor sealer according to product directions. Use a small brush and apply thin, even coats. Most finishes require 2-3 coats for durability. Sand lightly between coats with 220-grit paper.
The repair should blend seamlessly into the surrounding floor once the finish cures completely. Curing takes 24-48 hours depending on the product (Vacate and Safe Re-Entry Time for Spray Polyurethane Foam Application | Safer Choice). Avoid walking on the repair during this time.
Repair kits bundle common tools and materials into one package. They’re convenient but not always the best value. Understanding what’s included helps you decide if a kit makes sense for your situation.
Most kits include wood filler, stain markers in multiple colors, sandpaper, and a small brush. Some include polyurethane finish as well. The advantage is convenience, everything arrives together and is pre-selected to work as a system.
The disadvantage is that kits often include more colors than you need and less of each material than a bigger job requires.
Prevention is always cheaper than repair. Simple habits protect your floors and keep them looking new for decades. Most prevention strategies require minimal effort but consistent practice.
Pets cause the majority of hardwood floor scratches in homes. Dogs and cats have sharp nails that dig into finish with every step. The good news is that several prevention methods work well.
A simple maintenance routine prevents most scratches before they happen. The key is consistency, these habits work best when you practice them regularly.
Some damage exceeds DIY repair. Knowing when to call a professional saves money and frustration. Professional hardwood floor repair is worth considering in several situations.
Vinegar and olive oil can temporarily mask very light surface scratches by darkening the wood slightly, but they don’t repair the damage. This approach works best on minor cosmetic scratches in darker wood finishes. For anything deeper than a surface scratch, you’ll need wood filler, stain markers, or professional refinishing to achieve lasting results.
For minor scratches, use stain markers or touch-up pens that match your floor’s color, then buff with a soft cloth. For deeper scratches, apply wood putty or filler, let it dry, then color-match with stain. Buffing and polishing with fine-grit abrasive pads can also reduce the appearance of surface scratches without full sanding.
Dark hardwood floors hide light scratches more effectively than light finishes. Use dark stain markers or wood wax to fill scratches, then apply floor wax for a protective topcoat. For deeper damage, wood putty tinted to match your floor’s grain works well. Preventative maintenance with regular floor wax application also helps conceal minor damage over time.
Call a professional if scratches are deep enough to expose the wood grain extensively, if multiple large gouges affect the floor’s appearance, if the finish is severely damaged, or if you’re unsure about your floor’s finish type. Professional refinishing also makes sense for widespread scratches across the entire floor, which DIY methods can’t address cost-effectively.


